


NOTE: Guide updated on January 13, 2023.
Today in the blog we are going to talk about How to become a Hosting reseller step by step with your own brand in a complete guide, in the easiest way possible and with your own brand.
The guide is extensive and detailed within a general configuration (we don’t go into all the optional configurations or the installation and configuration of the WHMCS management system), as we want you to understand everything perfectly and have no doubts when you start selling Hosting.
What is a Reseller and how does it work?
Reseller plans are specific Hosting accounts for hosting resellers where you can manage all your clients’ accounts in a single panel.
Unlike multi-site or multi-domain plans, each Hosting plan you sell from your Reseller account will have its own management cPanel for the customer to manage his Hosting resources.
It goes without saying that each reseller plan has its own hosting to manage the website from which to sell the hosting plans.
Master Reseller, Alpha Reseller Hosting, Super Alpha Reseller Hosting & Mega Super Alpha Reseller Plans
The Master reseller hosting, Alpha reseller hosting, Super Alpha Reseller Hosting and Mega Super Alpha Reseller Hosting plans include an extra feature to get more value for money.
The difference with a Reseller plan is that with the Master plans you can also create reseller accounts apart from the Hosting ones. With the Alpha plans, the possibility of creating Master accounts is included. With the Super Alpha plans, the possibility of creating Alpha accounts is included. With the Mega Super Alpha plans, the possibility of creating Super Alpha accounts is included. This means that if you sign up for a Master, Alpha, Super Alpha or Mega Super Alpha plan, you will be able to sell Reseller accounts and create a network of resellers who, in turn, will sell their own Hosting plans.
- Reseller: hosting
- Master reseller hosting: reseller and hosting
- Alpha reseller hosting: master account reseller, reseller and hosting
- Super Alpha reseller hosting: alpha, account reseller, master account reseller, reseller and hosting
- Mega Super Alpha reseller hosting: super alpha, alpha, account reseller, master account reseller, reseller and hosting
Reseller Operation
Resellers contract AtresHost plans as a hosting provider and they in turn create their customized plans, with the resources they consider, applying their own rates to the plans, offering support without our intervention and under their own brand.
The management of your reseller account is done from WHM (Web Host Manager), a control panel to manage all the functions, such as creating hosting plans, suspending accounts and so on.
How to become a Reseller and sell Hosting
Logically, the first step is to hire a Reseller, Master Reseller, Alpha Reseller Hosting, Super Alpha Reseller Hosting or Mega Super Alpha Reseller Hosting plan, depending on what you want to sell. Remember the structure of the plans we have mentioned and decide on the one you want.
Optionally you can contract a dedicated IP for your account from 6€ per month
Reseller Hosting Plans
We have 4 Reseller Hosting plans: Basic, Advanced, Unlimited & Deluxe.
New: Now you can start your Reseller plan with our Starter Reseller.
For more detailed information on the plans, go to the Reseller Hosting section.
Master Reseller Hosting Plans
We have 4 Master Reseller Hosting plans: Basic, Advanced, Unlimited & Deluxe.
For more detailed information on the plans, go to the Master Reseller Hosting section.
Alpha Reseller Hosting Plans
We have 4 Alpha Reseller Hosting plans: Basic, Advanced, Unlimited & Deluxe.
For more detailed information on the plans, go to the Alpha Reseller Hosting section.
Super Alpha Reseller Hosting Plans
We have 4 Super Alpha Reseller Hosting plans: Basic, Advanced, Unlimited & Deluxe
For more detailed information on the plans, go to the Super Alpha Reseller Hosting section.
Mega Super Alpha Reseller Hosting Plans
We have 4 Mega Super Alpha Reseller Hosting plans: Basic, Advanced, Unlimited & Deluxe.
For more detailed information on the plans, go to the Mega Super Alpha Reseller Hosting section.
Reseller Deluxe Hosting Plans
Deluxe plans is our PREMIUM experience in Unlimited Reseller Hosting, Unlimited Master Reseller Hosting, Unlimited Alpha Reseller Hosting, Unlimited Super Alpha Reseller Hosting and Unlimited Mega Super Alpha Reseller Hosting plans. Deluxe plans includes all the features of the “Unlimited” plan, adding an additional layer with all the needs that a Reseller may require.
The “Deluxe” plans incorporate the following additions that will be essential for you and your business: WHMCS License, dedicated IP, Reverse PTR, SEO Tools, WordPress Toolkit Deluxe and Free Domain.
Once you have your plan buyed, it’s time to start working.
WHM Configuration
Before creating your business website, installing the administration manager and so on, the first thing you have to do is configure the plans you are going to sell, with the features you are going to include and the limitations you want for each one.
WHM can be accessed from the following addresses: https://atreshost.com/en:2087/ or https://atreshost.com/en/whm/ or https://youdomain.com/whm/.
The system will ask you for a username and password that you will have available in the welcome email you will receive when you contract your plan. Enter your access data and click on Login (Iniciar sesión).
Create Hosting / Reseller packages & Functions
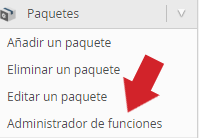
Once you are logged in, the first thing you need to do is create a new Function List. From the “Packages” module, click on FEATURE MANAGER.
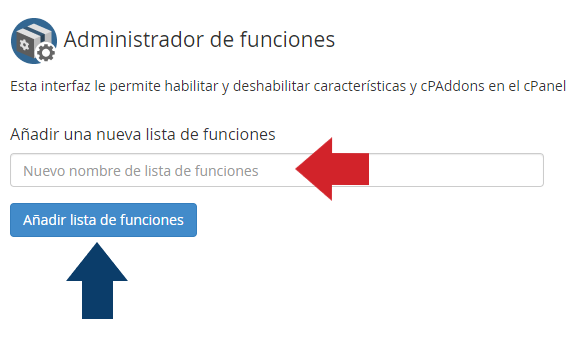
Then type a name for the new function list and click “Add new list”.
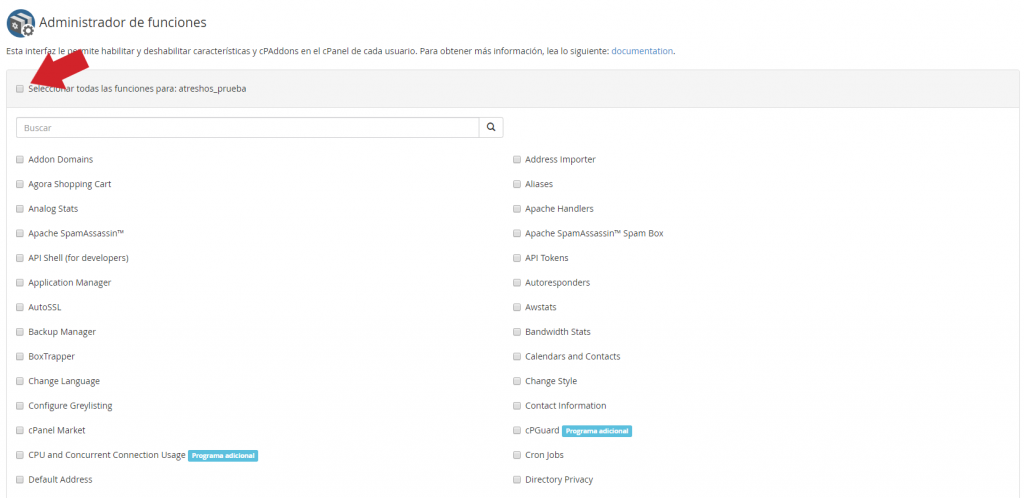
NOTE: It is VERY IMPORTANT that you do not enable the boxes MultiPHP INI Editor, MultiPHP Manager and WordPress Toolkit Deluxe in the list of functions. The management of PHP is done from the application “Select PHP Version”, if you activate MultiPHP INI Editor and MultiPHP Manager, you can generate PHP conflicts.
Regarding WordPress Toolkit Deluxe, it is a paid application and will not work if you do not have licenses for its use.
You can find more information about how to purchase WordPress Toolkit Deluxe licenses by clicking on the following link: WORDPRESS TOOLKIT DELUXE.
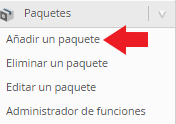
Now it’s time to create the Hosting or Reseller packages that you will sell on your website. From the main menu, navigate to the “Packages” section and click on Add a package to start configuring the plan parameters.
Next you will be shown the different configurable options of the plan you are going to create. We’re going to set up a test hosting plan so you can see how it works.
The fields support numeric values from 0 to unlimited and expressed in binary format. If you don’t know how to express the units in binary, we leave you here an automatic converter so you can use it: Converter GB to MB.
Now we’re going to explain all the options when creating a hosting package one by one:
NOTE: Package names CANNOT have special characters including underscores or other special characters (e.g., * – , . | / ), nor can they have spaces in the package name. In addition, package names must not exceed 8 characters. Although in some cases OrbisReseller may allow longer package names, it is best if this length is not exceeded. If you do not follow the conditions on package names, the assignment of permissions to the accounts you create will not be applied correctly.
- Package name: The name we’re going to give to the plan we’re creating.
- Disk quota (MB): The number of MB (Megabytes) we want to assign to the plan. If we want to assign 10GB of space, we will enter the value in Megabytes, in this case it will be 10240.
- Monthly broadband (MB): The total monthly traffic we want to allocate. In AtresHost all plans are unlimited in terms of transfer, so let’s check the Unlimited box.
- FTP accounts maximum: Number of FTP accounts that can be created We will configure 5 accounts maximum.
- Max email accounts: The number of email accounts you want to allow to be created. We mark a maximum of 15 accounts.
- Max Quota per Email Address (MB): Maximum space available for each email account. The space limit for each mailbox is 5GB maximum (5120MB). Do not mark the option as Unlimited or modify the value above 5120.
- Max email lists: Maximum number of mailing lists. We set it to 10.
- Max databases: Maximum number of MySQL and PostgreSQL databases to be created. We indicate 5.
- Max subdomains: Maximum number of subdomains. We set it to 5.
- Max Parked Domains: Maximum number of parked domains. As it is a “Basic” plan, we mark 0 (no parked domains) and thus, we can reserve that feature for higher plans.
- Max Addon Domains: Maximum number of additional domains in the same hosting plan. As it is a “Basic” plan, we mark 0 (no additional domains) and thus, we can reserve that feature for higher plans.
- Maximum Hourly Email by Domain Relayed: Maximum number of emails that can be sent in one hour. This value is set by default and cannot be altered.
- Maximum percentage of failed or deferred messages a domain may send per hour: This value is set by default and cannot be altered.
- Options: We will only enable the CGI Access option. If you want to give SSH access to your clients, check the option.
- cPanel Theme: There’s only one issue, so we’ll leave it as it is by default.
- Feature List: You have to create a list of features in advance from FEATURE MANAGER > ADD NEW LIST, select the features you want to put in the cPanel of your customers and save it. Then, just select it from the drop down menu. DO NOT LEAVE THE DEFAULT LIST OR SELECT ANY OTHER LIST THAN THE ONE YOU CREATED.
- Locale: Choose the language you prefer from 34 languages.
- Package Extensions: Do not check the box if you do not have a Deluxe plan or if you have the Magic Spam PRO service.
MagicSPAM PRO allows you to make custom configurations in MagicSpam per cPanel account, such as whitelisting IPs of blacklisted servers, domains… and, thus, being able to receive mails from servers with IP reputation problems.
You can contract MagicSPAM PRO for 20,99€/m for your entire Reseller network or contract/upgrade your plan to the DELUXE service which includes it for free.
Finally, to create the package click on Add.
You have already created your first hosting plan. Now you have to do the same with the different hosting plans you want to sell, remembering the space limitations you have in your reseller plan when assigning space in your plans.
If you have signed up for an Unlimited or Deluxe plan, you don’t have to worry about any limitations.
Assigning Reseller, Master, Alpha or Super Alpha Functions
Now let’s set up a package as a Reseller, Master, Alpha or Super Alpha.
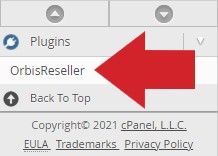
The first thing to do is to create the package (as you just read lines above) and then assign the Reseller, Master, Alpha or Super Alpha function to it (depending on the plan you have contracted and the feature you want to give it). Once you have created the package and from the main menu, navigate to the Plugins (Additional programs / addons) section and click on OrbisReseller.
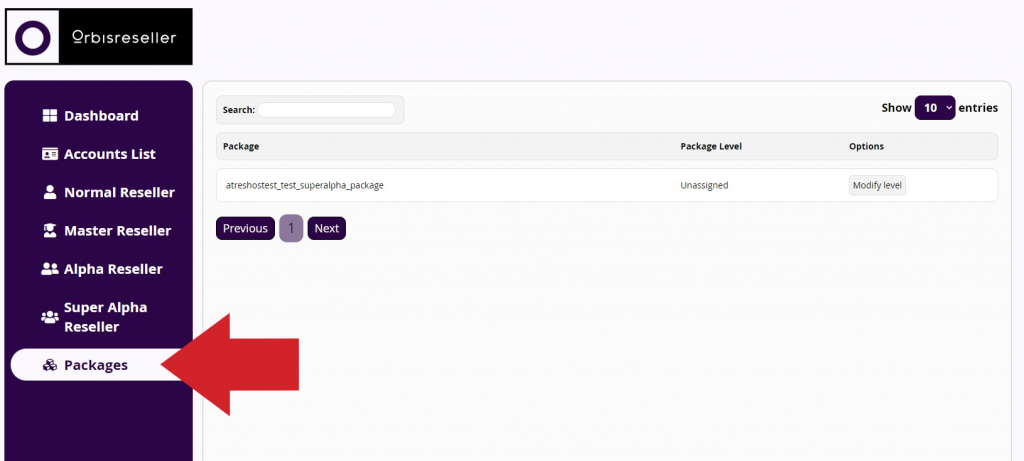
Next, you have to click on Packages (located in the left menu).
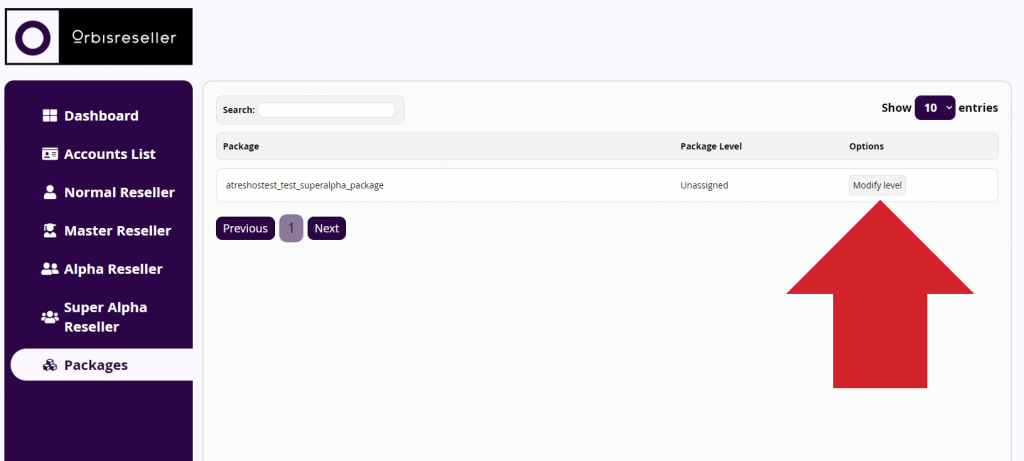
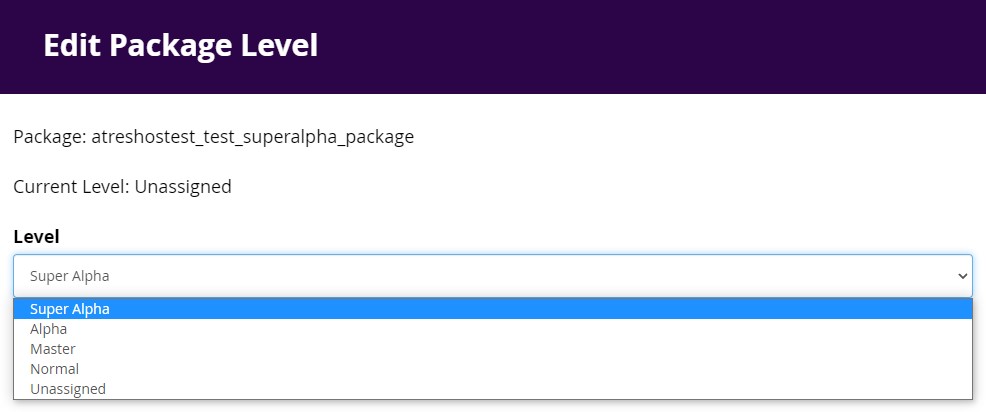
Finally, you have to choose the plan you want to assign the Reseller, Master, Alpha or Super Alpha feature to. Click on Modify Level and choose the desired feature (Normal to make the plan a reseller, Master to make it a Master, Alpha to make it an Alpha and Super Alpha to make it a Super Alpha).
Create an new account at WHM
There are 2 ways to create a new account at WHM:
- From WHM.
- From OrbisReseller plugin.
- From WHMCS.
Create a New Account from WHM
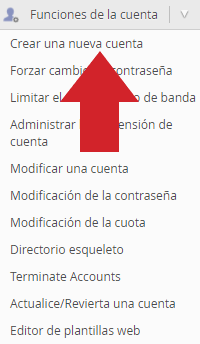
To create an account from WHM, go to “Create a New Account” from the left menu > Account Fuctions > Create a New Account.
Once inside, we will proceed to fill in the available fields as follows:
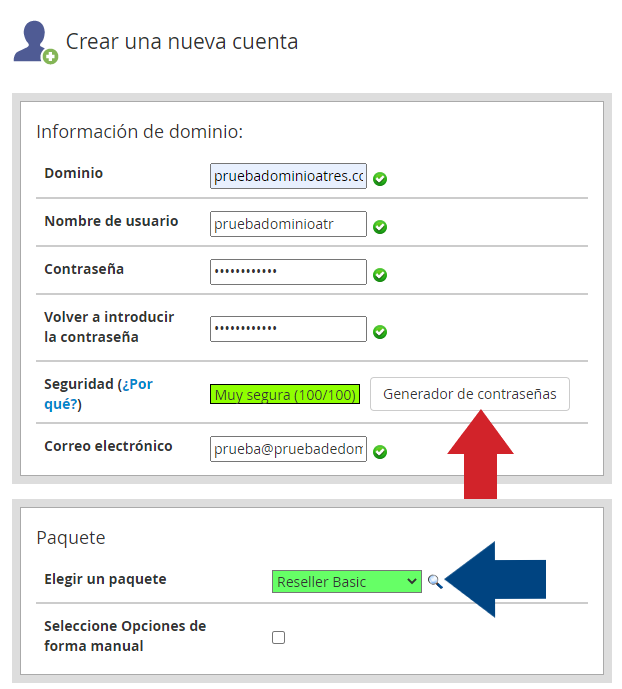
Domain Information
- Domain: write the domain of the account to be created.
- Username: the field will be filled in automatically, although you can specify the username you want.
- Password: enter the password for the account.
- Re-type Password: re-enter the password for the account.
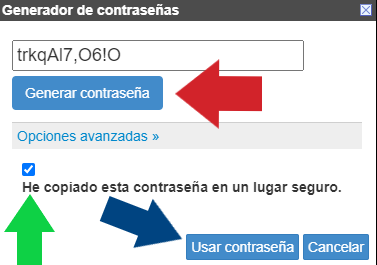
- Strength (Why?): Click on Password Generator to generate a very secure password (100/100).
- Email: enter the email address of the account.
Package
- Choose a Package: choose one of the packages you have created.
- Select Options Manually: don’t check the box.
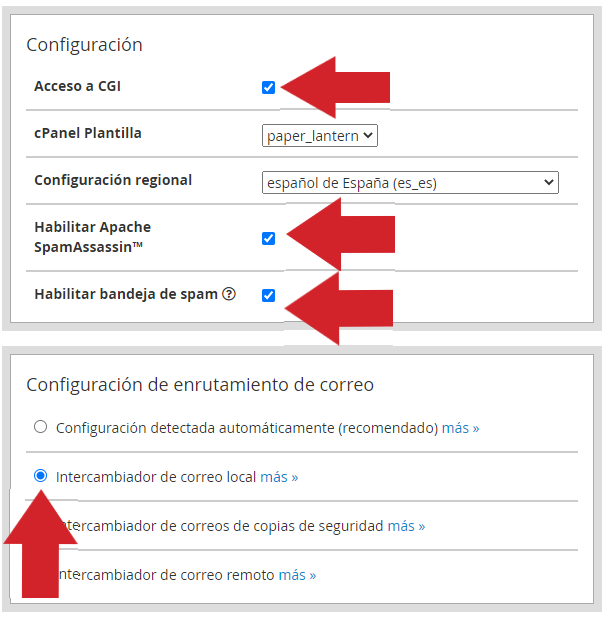
Settings
- CGI access: check the box as active.
- cPanel Theme: paper_lantern
- Locale: choose the default language for the cPanel account.
- Enable Apache SpamAssassin™: check the box as active.
- Enable Spam Box: check the box as active.
Mail Routing Settings
- Local Mail Exchanger »: select the option.
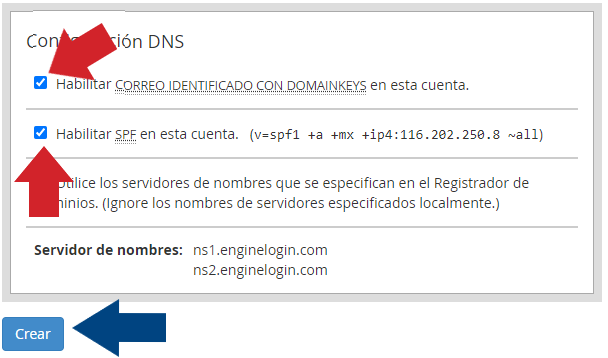
DNS Settings
- Enable DKIM on this account.: check the box as active.
- Enable SPF on this account. (v=spf1 +a +mx +ip4:116.202.250.8 ~all): check the box as active.
- Use the nameservers specified at the Domain’s Registrar. (Ignore locally specified nameservers.): don’t check the box.
- Nameservers: ns1.enginelogin.com ns2.enginelogin.com
Finally, after filling in the fields as indicated, click on “Create”.
Create an account cPanel from OrbisReseller
The cPanel accounts in OrbisReseller are created from OrbisReseller > from the menu on the left, Accounts List > + Create Account.
A new window will open in which you will have to enter the information required for the creation of the cPanel account:
Configuration
- Username: username of the account.
- Domain: enter the domain of the account to be created.
- Owner: select the account owner.
- Email: your customer’s email address.
- Package: choose one of the packages you have created.
- Password: enter a password for the account.
Finally, after filling in the fields as indicated above, click on “Confirm”.
Create an Reseller account from OrbisReseller
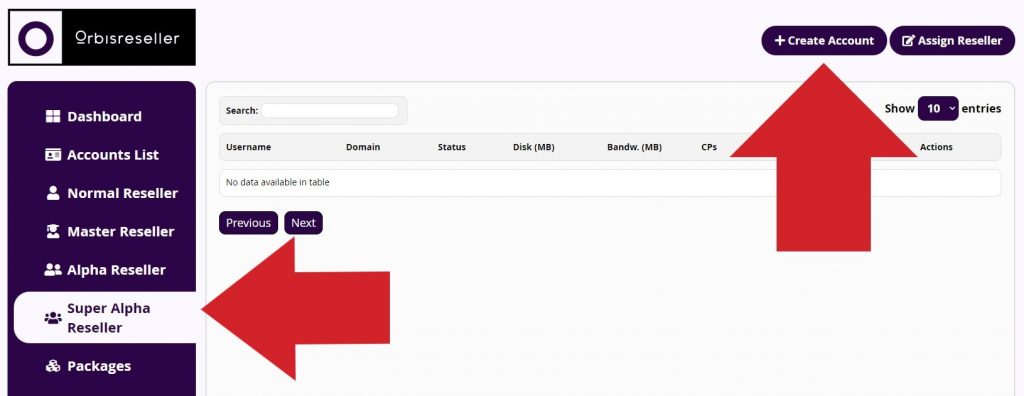
Reseller accounts are created from OrbisReseller > from the left menu, select the desired reseller level > + Create Account.
A new window will open in which you will have to enter the information required for the creation of the reseller account:
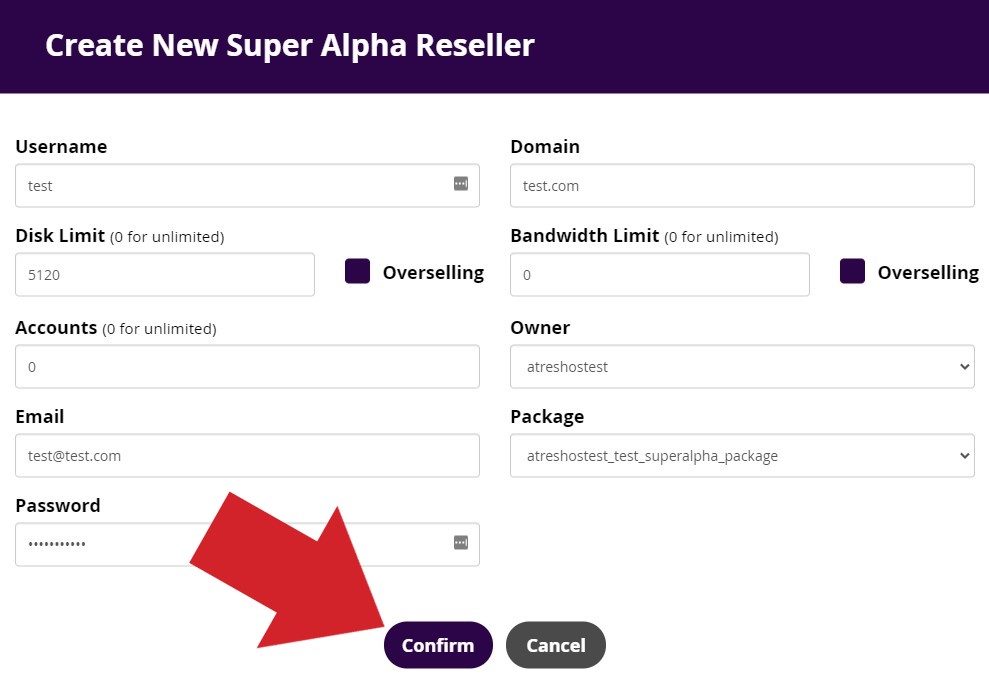
Configuration
- Username: username of the account.
- Domain: enter the domain of the account to be created.
- Disk Limit: enter the space in MB allocated to the account. 0 for unlimited space.
- Bandwidth Limit: enter the traffic assigned to the account. 0 for unlimited traffic.
- Accounts: enter the accounts that the reseller account can create. 0 for unlimited accounts.
- Owner: select the account owner.
- Email: your customer’s email address.
- Package: choose one of the packages you have created.
- Password: enter a password for the account.
Finally, after filling in the fields as indicated above, click on “Confirm”.
Create a new account from WHMCS
Accounts in WHMCS are generated automatically when a sale is made after creating the products in the manager.
Other aspects of WHM
We are not going to go into detail about the rest of WHM’s functions, remember that this is a general guide on how to become a Reseller. But broadly speaking, you can customize practically anything you want, chang the logo that appears on cPanel, modifying account suspension templates, unblocking IPs…
If you wish to further investigate the rest of the functions in the main menu, you can do so with the help of the official WHM documentation by clicking here or by visiting the official forums from the following link.
cPanel Applications
To learn more about the applications available on your cPanel, access our BEGINNER’S GUIDE where we detail each of the available apps.
Website and WHMCS
The next step is to create your website where you will detail your services, plans, prices, support and so on. From AtresHost we recommend you to use WordPress content management system (CMS).
WHMCS Administrative Manager
The last step is to install a multifunctional administrative manager such as WHMCS.
There are several alternatives to WHMCS, but we believe that today it is the best option to manage your business and connect cPanel and WHM, automating all payment, invoice and support processes. You can find more information about WHMCS and how to buy it by clicking HERE,
If you buy the WHMCS license with us for 15.99€ per month, you will save 3€ per month compared to buying it from their website.
To install and configure WHMCS, access the official documentation by clicking here. There are dozens of detailed step-by-step tutorials, as well as video tutorials and much more information to help you.
Connecting the Server to WHMCS
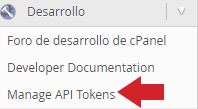
The first step in connecting the server and WHMCS is to create a API TOKEN in WHM. Access WHM and from the “Development” module, click on “Manage Api Tokens”.
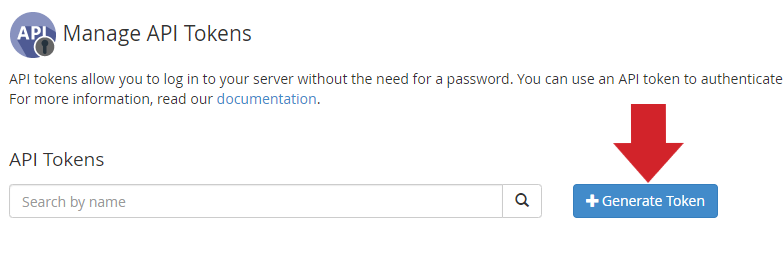
Then click on “+Generate Token”.
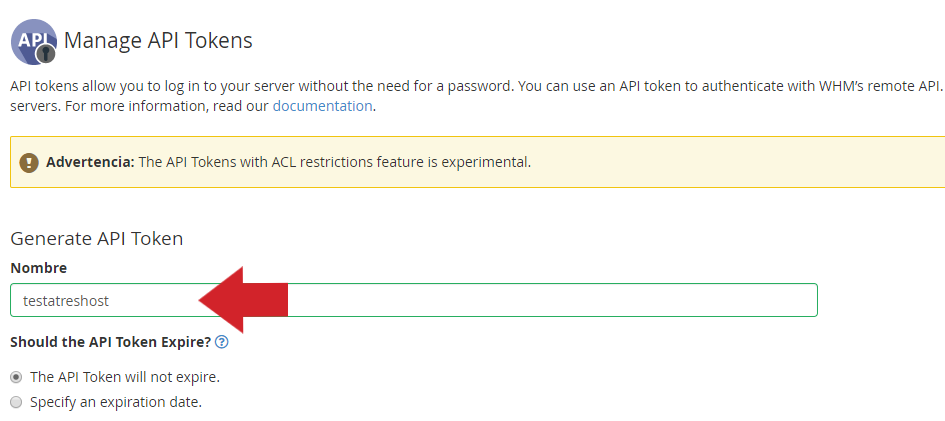
Enter a name for the API and without touching anything else, scroll down to the bottom of the page and click “Save”.
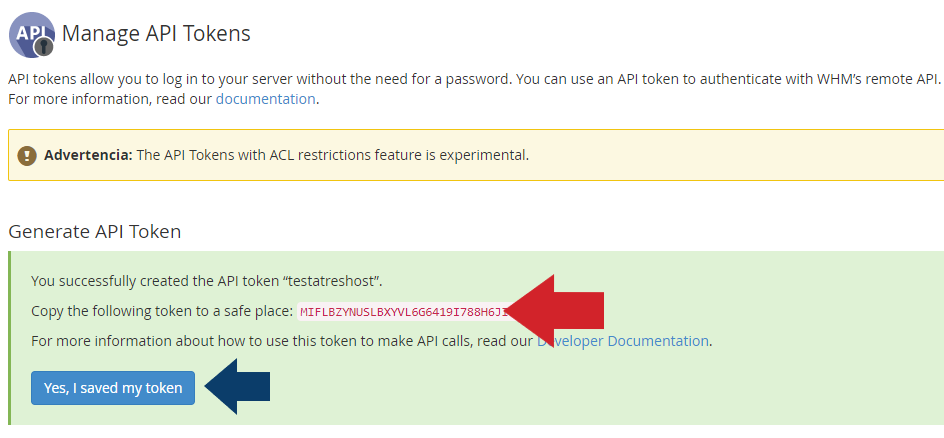
Finally, copy the generated token and click “Yes, I saved my token”.
With the token already generated, we enter our WHMCS administration panel and from the menu, go to TOOL ICON > SYSTEM SETTINGS.
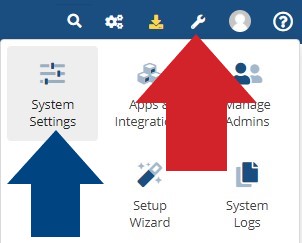
Under “System Settings”, click on “Servers”.

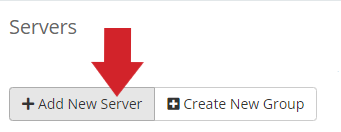
Once you’re on the servers page, click “+ADD NEW SERVER”.
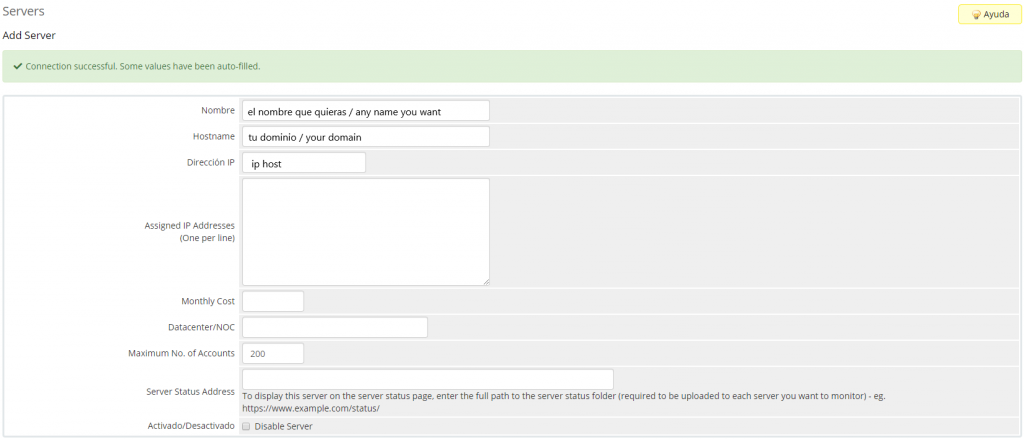
Configure the data as follows and click “TEST CONNECTION”.

- MODULE: cPanel
- HOSTNAME OR IP ADDRESS: your domain
- USER: the user with whom you access WHM/CPANEL
- PASSWORD: the password with which you access WHM/CPANEL
- API TOKEN: the token you have generated in WHM (if you don’t have one, access WHM and generate the api token from “MANAGE API TOKEN”)
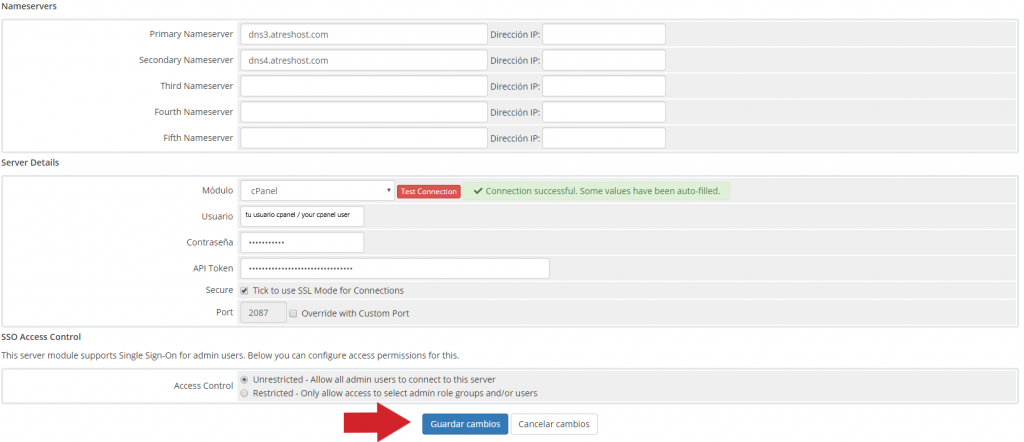
If the data entered are correct, you will be taken to the next page, indicating that the connection has been made successfully.
Finally, fill in the NAMESERVERS data and click on “SAVE CHANGES” to have the server connected to WHMCS.
And here ends the general guide on how to become a reseller.
We hope you find it helpful and venture into creating your own business.