


Today we are going to teach you How to add an additional domain and subdomain in cPanel with this simple step by step tutorial.
Adding an additional domain in cPanel
To add a domain to your hosting, you must first log in to your cPanel account. Once you have logged into your cPanel account, navigate to the “Domains” module and click on “Addon Domains”.

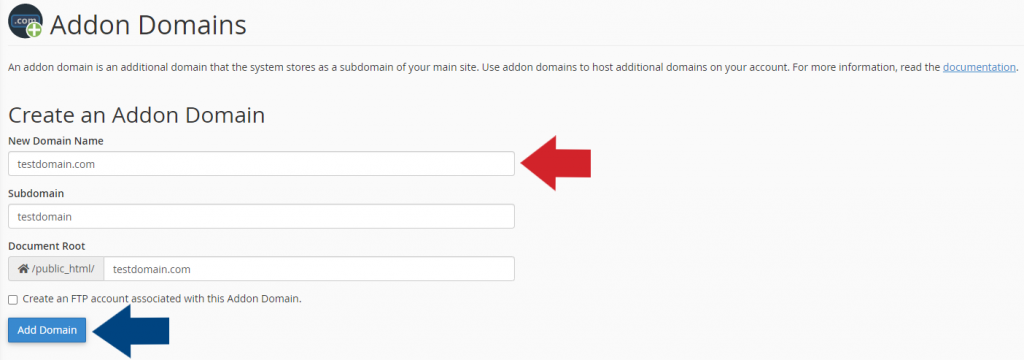
In “Addon domains”, you will see a kind of form to be filled in with the data of the domain you want to add:
- New domain name: You must put the name of the domain you want to add without http://www, only the domain (example: testdomain.com).
- Subdomain: You do not need to enter any data. When you put the domain name in the field, it will be filled in automatically.
- Document Root: By default, public_html/testdomain.com will appear (the name of the directory will change to the one you specify). You can change the directory path to whatever you prefer.
- Create an FTP account associated with this addon domain: If you want to create an FTP account for direct access to the files of the add-on domain, check the box and you will be able to specify the FTP username and password for access.
Once all the fields are completed, click on “Add Domain”.
If you have completed the above step successfully, you will receive a message confirming the process.

Add an additional subdomain in cPanel
To add a subdomain to your hosting, you must first log in to your cPanel account. Once you have logged into your cPanel account, navigate to the “Domains” module and click on “Subdomains”.

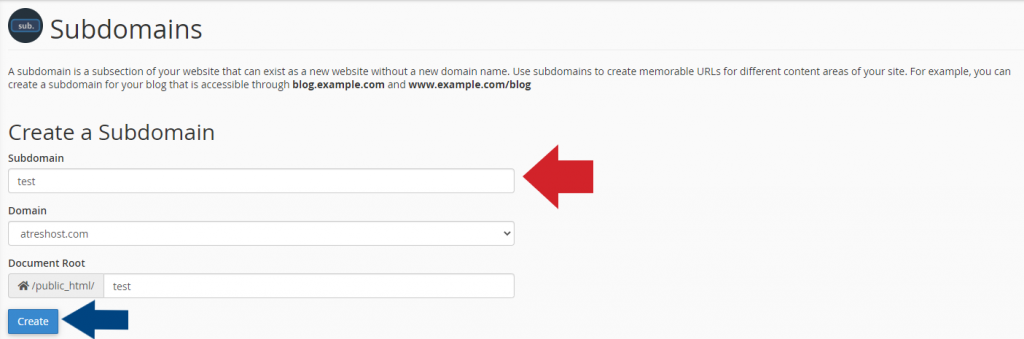
In “Subdomains”, you will see a kind of form to be filled in with the data of the subdomain you want to add:
- Subdomain: You must put the name of the subdomain you want to add without http://www, only the name of the subdomain (example: test).
- Domain: Select the domain for which you want to create the subdomain.
- Document Root: By default, public_html/test will appear (the name of the directory will change to the one you specify). You can change the path of the directory to whatever you prefer.
Once all the fields are completed, click on “Create”.
If you have completed the above step successfully, you will receive a message confirming the process.