

Today we are going to teach you How to configure PHP options with .htaccess files with this simple step by step tutorial.
Introduction: Setting PHP options
The AtresHost cPanel has an application called “Select PHP Version” in which you can configure PHP extensions, as well as different PHP options through a very intuitive graphical interface.
However, you may want to set up some PHP options that are not available from the cPanel configurator, so we are going to teach you how to configurate PHP options through an “.htaccess” file.
Configuring PHP options with .htaccess
To configure and customize PHP options, you need to create an “.htaccess” file in the root of your directory (if you have one, modify it), either through the cPanel “File Manager” or from a “FTP” program.
Before explaining the process, it is necessary to know what an .htaccess file is to understand why you can set up PHP options with it.
What is an .htaccess file?
The .htaccess file (HyperText Access) is an Apache server software configuration file, which contains the directives that define Apache’s behavior.
Tutorial: Configuring PHP options
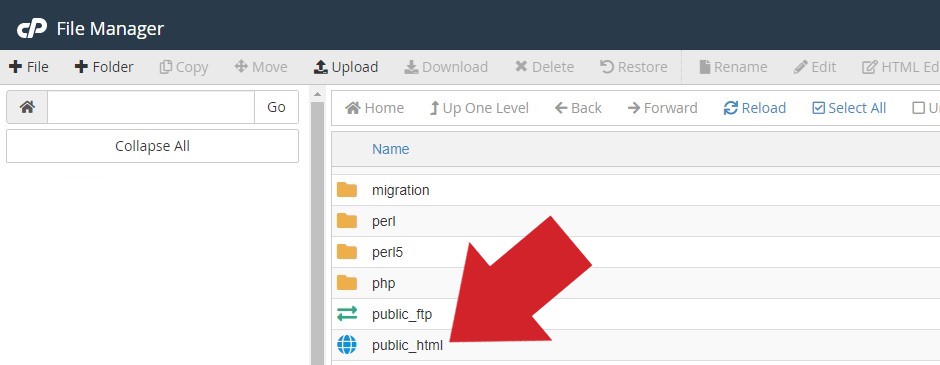
Access cPanel and go to “File Manager”.

From the root directory of your account, go to the “public_html” folder.
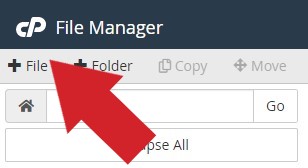
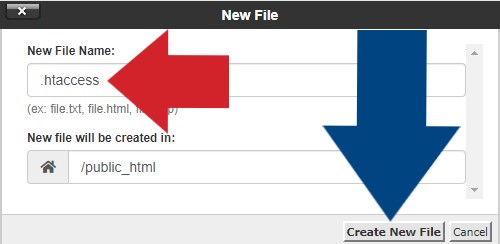
Once you are in “public_html”, create a new file by clicking on “+ File”.
A popup window will open. Enter the name of the .htaccess file (with the dot) and click “Create New File”.
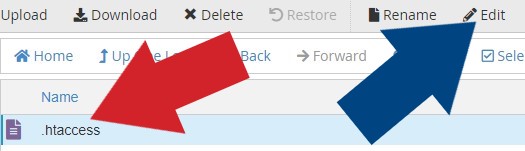
Once the “.htaccess” file is created, select the file and click on “Edit”.
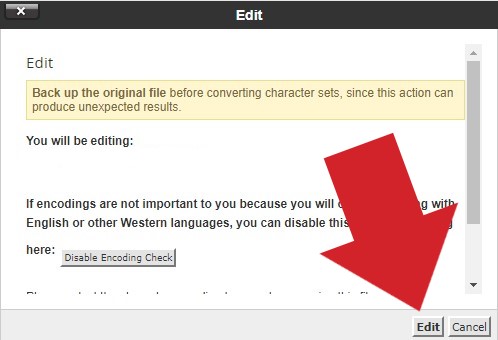
Again a popup window will open, click on “Edit”.
In the file editor, enter the following code and click “Save Changes”.
<IfModule php7_module>
php_flag display_errors Off
php_value max_execution_time 180
php_value max_input_time 1000
php_value max_input_vars 4000
php_value memory_limit 256M
php_value post_max_size 256M
php_value upload_max_filesize 256M
</IfModule>

The directives and values shown in the code are the most common, but you can always add more directives to be configured according to your needs. You can find more information about the directives and configurations available on the APACHE website and on the PHP website.
NOTE: If you have an “.htaccess” file already created, modify it and add the code above. Don’t forget to save your changes.
NOTE 2: By default, the “.htaccess” files are hidden in the “File Manager”. To view them, you must click on “Settings” and select the “Show Hidden Files (dotfiles)” checkbox to display them.
NOTE 3: If you need to configure PHP options for an additional domain or subdomain, you can perform the same process by creating an “.htaccess” file in the root of the additional domain or subdomain directory.