Today we will teach you How to connect to your account using the PuTTy SSH terminal with this simple step by step tutorial for AtresHost Hosting and Reseller services.
ACCESS THROUGH SSH
SSH keys enable secure file transfer and secure remote login over the Internet. To do this, the SSH connection is encrypted for secure connection and transmission.
In this tutorial we explain how to generate these SSH keys and how to use them in the PUTTY software.
INTRODUCTION
SSH (Secure Shell) is a program for logging into another server over a secure network. It provides strong authentication and secure communications over insecure channels such as the Internet. Login, command execution and text are encrypted when using SSH. The use of public key authentication is an alternative to password authentication. Since the private key must be saved in order to be authenticated, it is virtually impossible to force.
The public and private key is similar to a puzzle. They are created together for use during the login or authentication process. The public key resides on the server. The private key resides locally on your computer. When you try to log in to a server, the public key and private key are compared. If they “match”, you will be allowed to log in at the server location
CREATION OF SSH KEYS
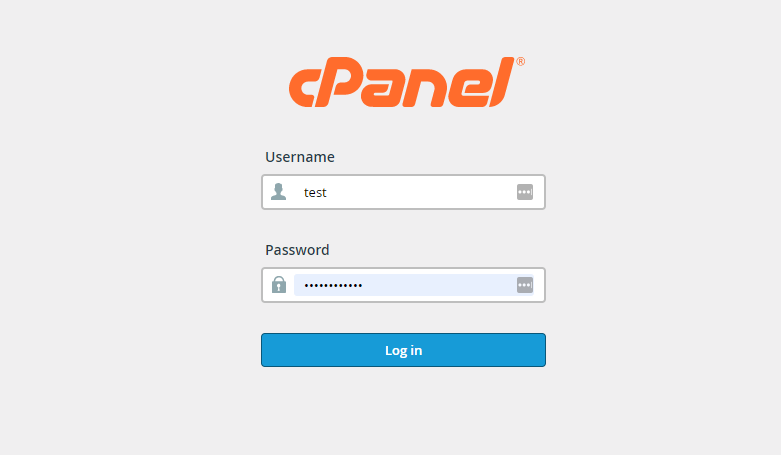
Login to your cPanel account using the link below: https://d10.enginelogin.com:2083/
From the “Security” module, click on “SSH Access”.

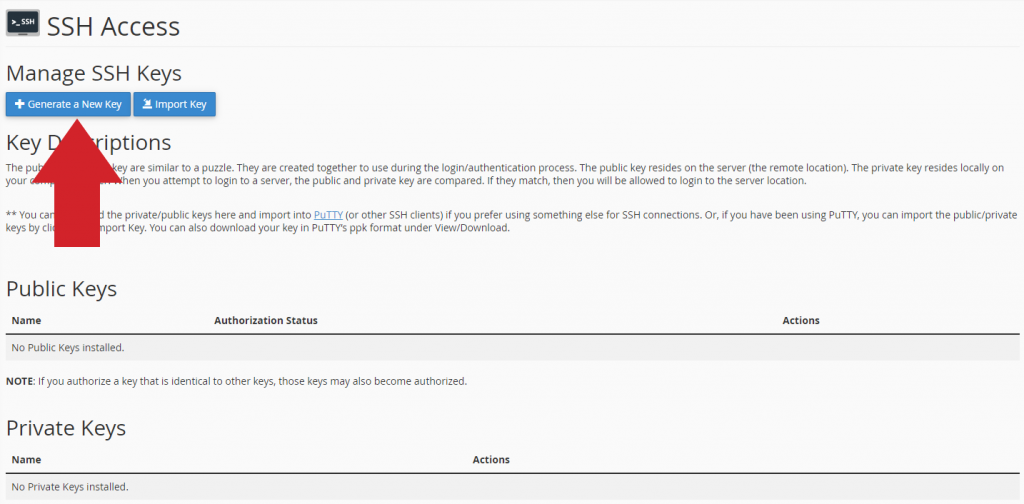
Then click on the “Manage SSH Keys” button.

Proceed to “Generate a new key”.
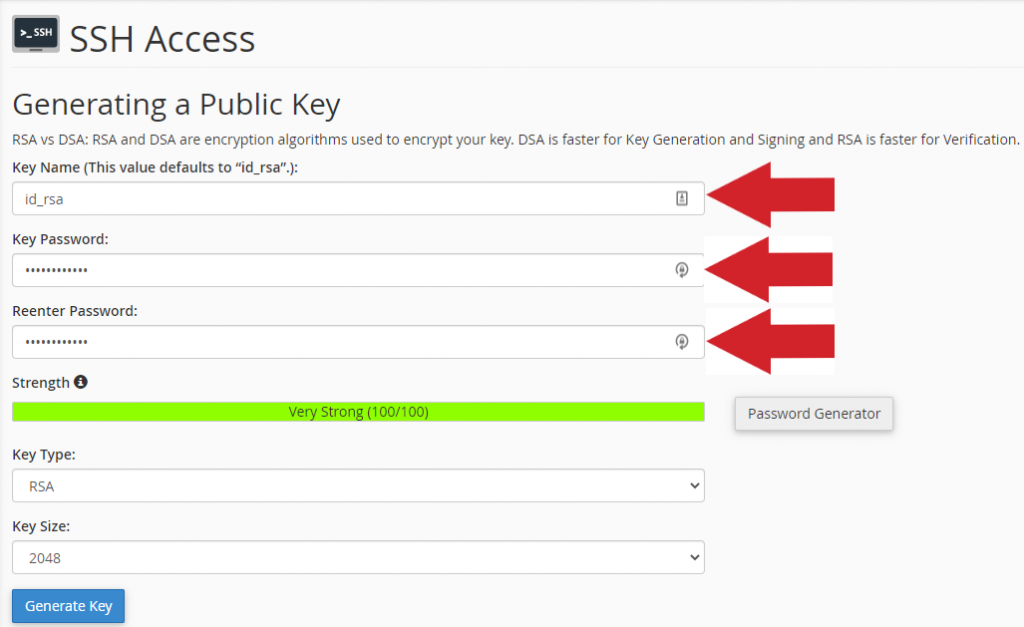
Set a name (the default name will be id_rsa) and a secure password. It is important to set a secure password to avoid brute-force attacks.
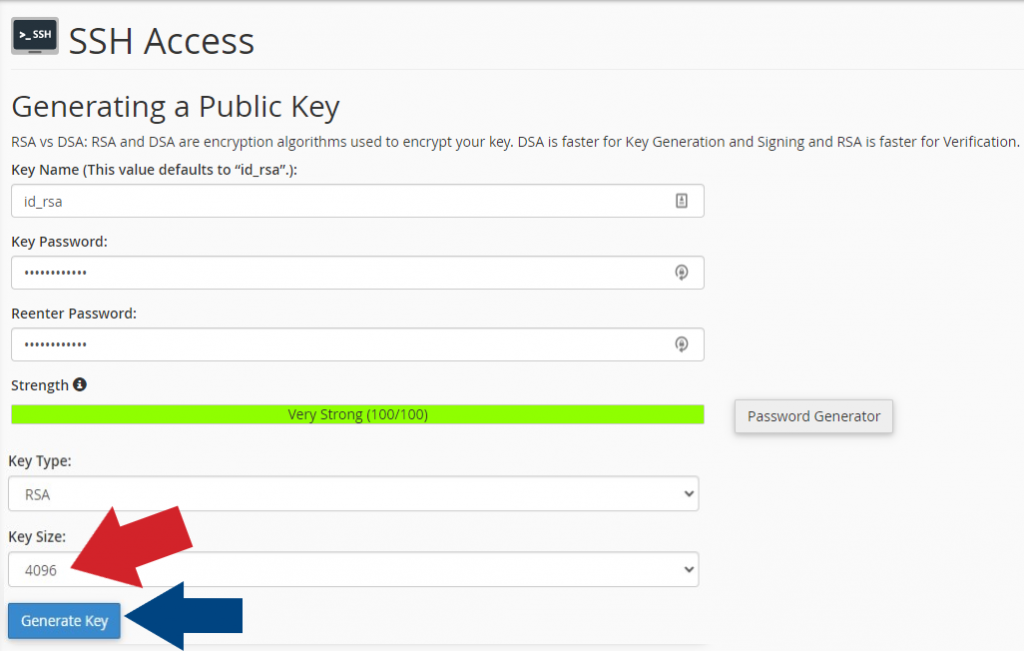
Set the key size to 4096 and click “Generate key”.
Once you receive confirmation that the key has been successfully generated, click on “Return”.
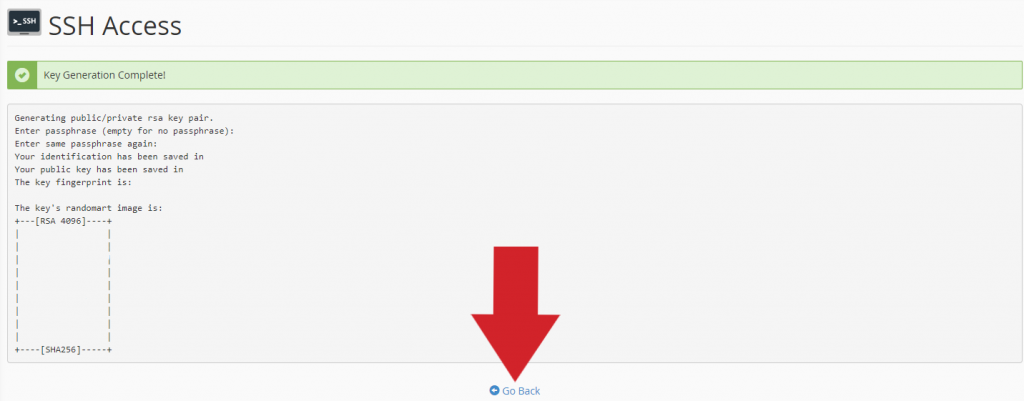
In the “Public keys” section, click on “Manage” in the key you have generated.
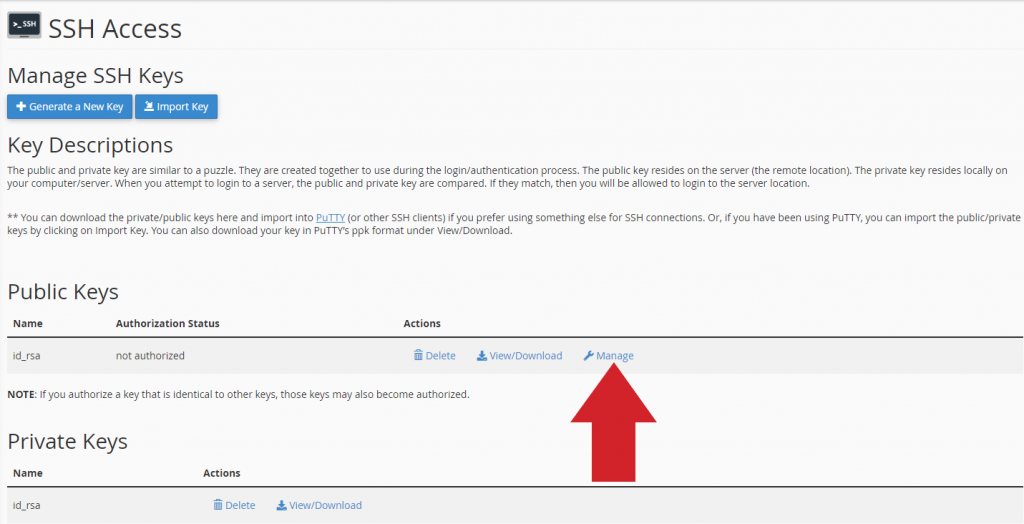
Then, click on “Authorize” to validate and leave the created key operational.

You will receive a confirmation that the key has been authorized. Click on “Return”.

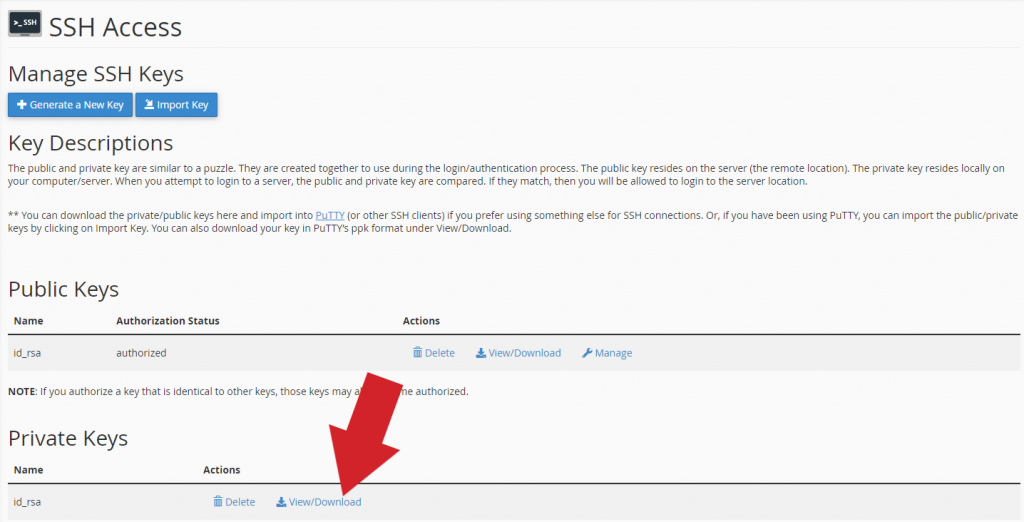
Now proceed to download the private key. To do this, in the section “Private keys” click on “View/Download”.
At the bottom of the page enter the password you have previously set in “Convert the “id_rsa” key to PPK format:”, and click “Convert”.
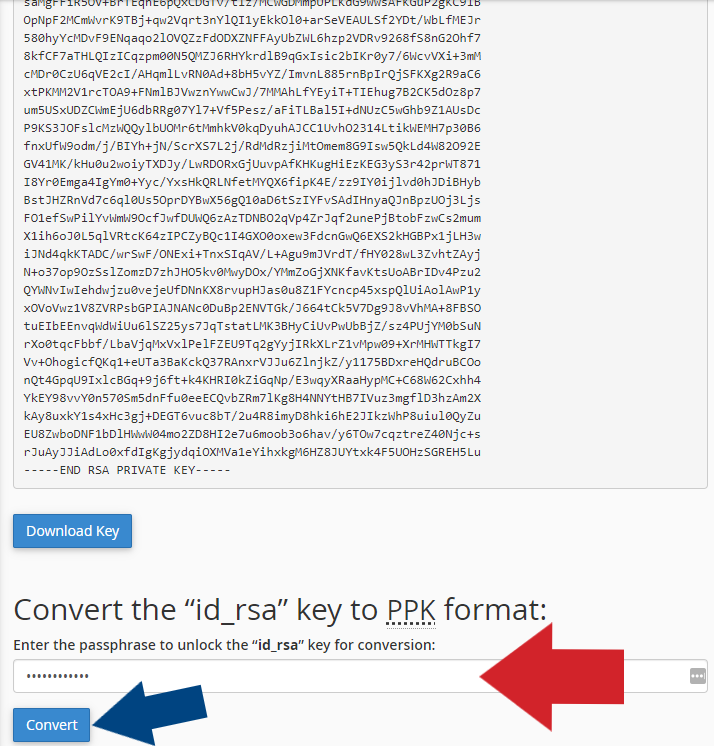
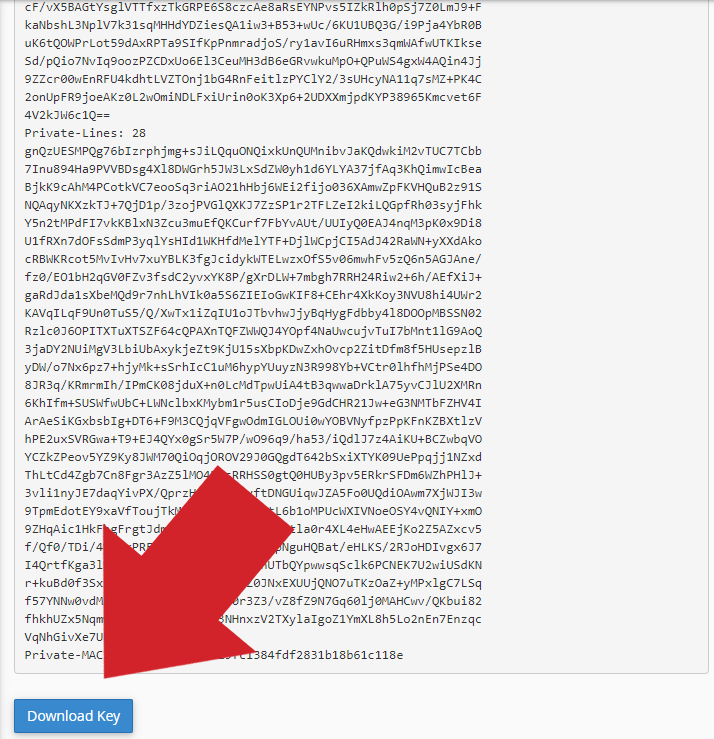
Finally, navigate to the bottom of the page and click on “Download key”.
CONNECTION THROUGH PUTTY
Proceed to download and install the program PUTTY through the following link: https://www.putty.org/

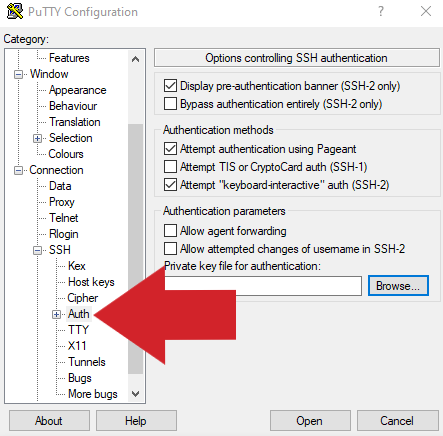
Start Putty software. Once the program is started, in the left menu go to Connection > SSH > Auth.
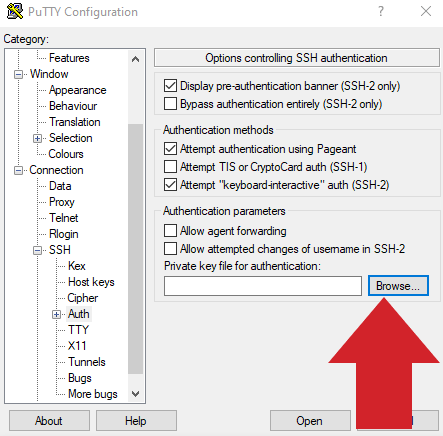
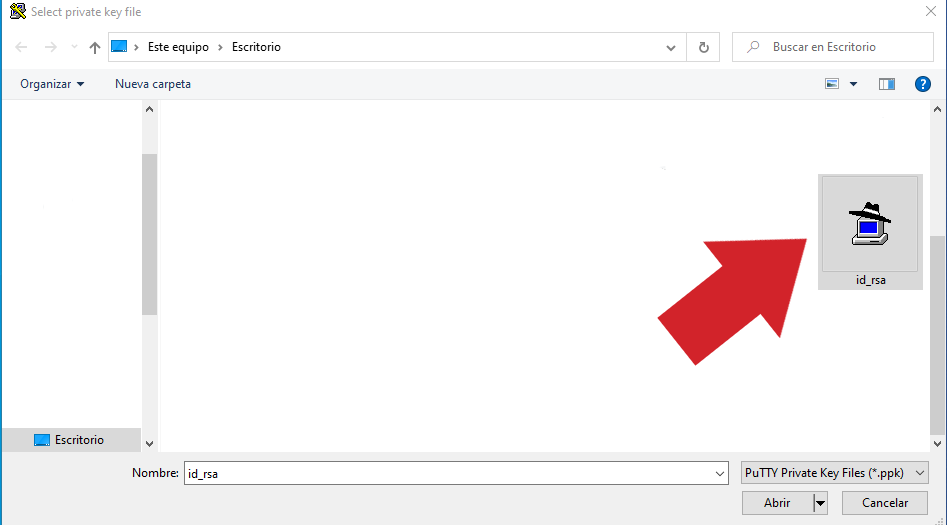
In the central module, section “Private key file for authentication” click on “Browse” and select the key you just downloaded.
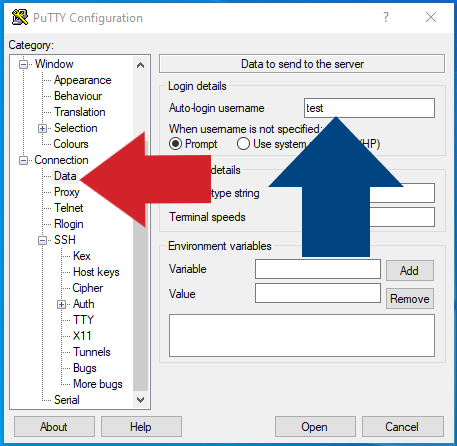
In the Connection > Data section, enter the cPanel username under “Auto-login username”.
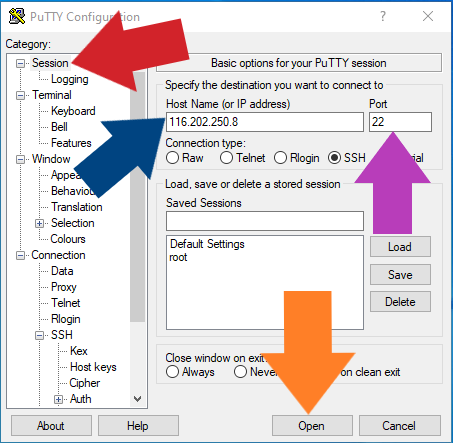
Finally, enter the Session section of the left menu. Here, fill in the “Hostname” section with the server’s IP (116.202.250.8), leave the port at number 22 (FOR SECURITY REASONS, THE SSH PORT IS NOT PUBLIC – IT IS NOT PORT 22-. PLEASE SEND US A TICKET TO GET THE SSH PORT) and click on the “Open” button to establish the connection with the server.
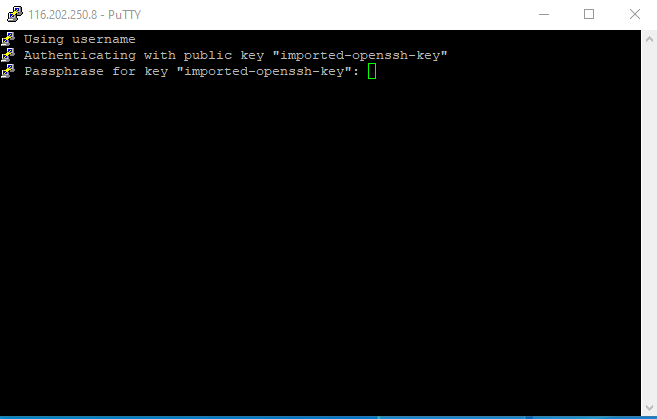
A terminal will appear where you will have to re-enter the password of the generated key.
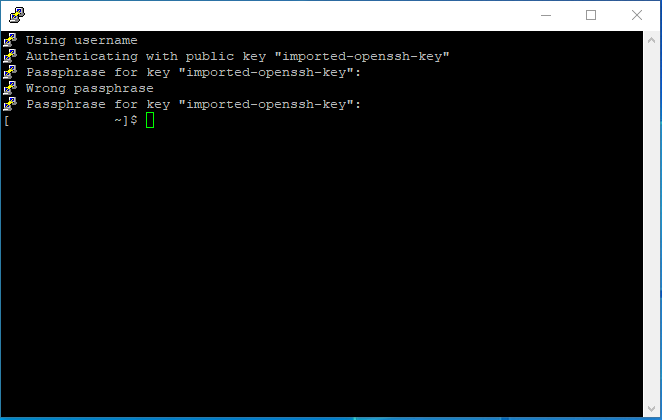
Once you have entered the password, you will have established a secure connection to the server.
So much for the tutorial to connect to your account using the PuTTy SSH terminal.


