In this tutorial, you will learn How to manage files and directories in cPanel.
How to manage files and directories in cPanel
Follow the steps below to manage files and directories in cPanel.
Login to cPanel
Open your web browser and enter your cPanel URL or log in to cPanel directly from the AtresHost customer area.
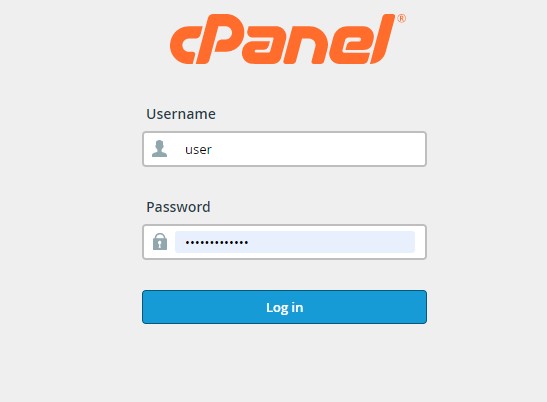
Enter your cPanel username and password and click “Login” to access the control panel.
Navigate to the “Files” section in cPanel.
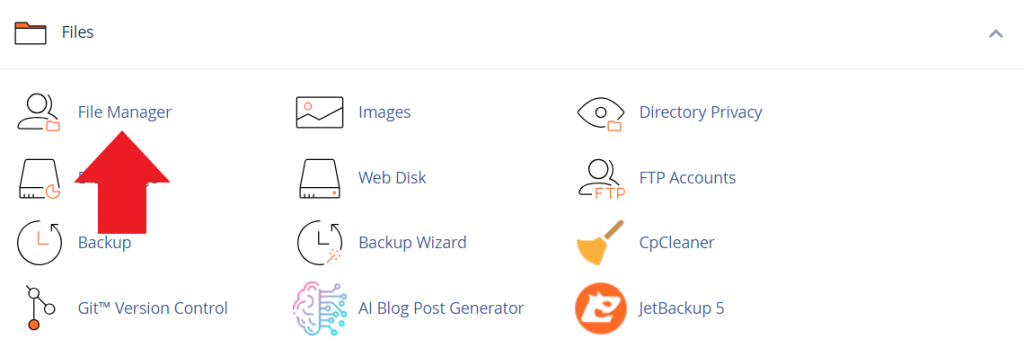
Once you are logged into cPanel, find the “Files” section and click on the “File Manager” icon. This will take you to the cPanel file manager.
Explore the directory structure
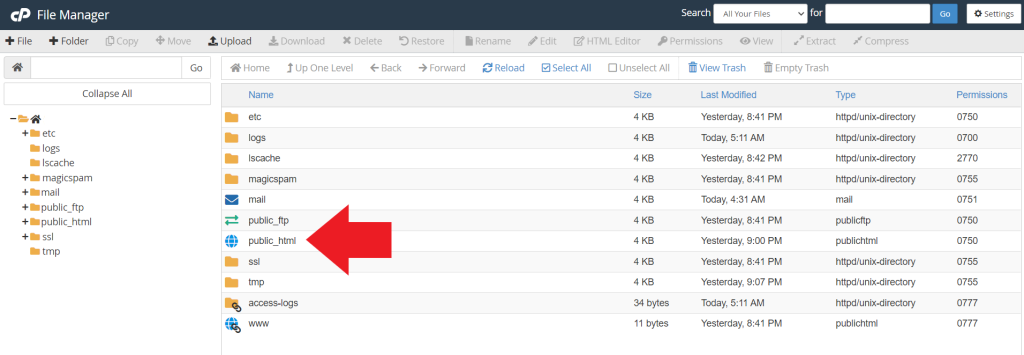
In the “file manager”, you will see a directory structure similar to the one on your computer. The main folder is “public_html”, which is where the website files are located.
Browse through directories
Click on the folders to navigate through the directories. You can click on the folder name or the folder icon to access its contents. In this case, we will access “public_html”.
Create a new directory
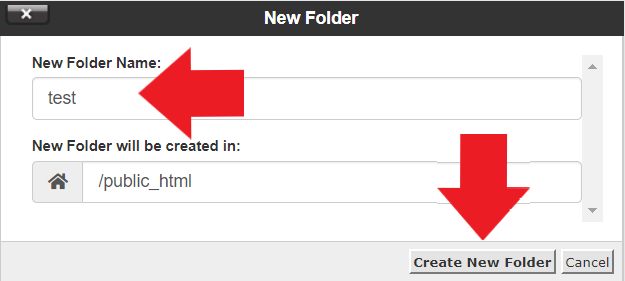
If you want to create a new directory, click on the “+ Folder” button on the toolbar (a new window will open).

Assign a name to the folder (directory) and click on “Create new folder” to confirm the creation of the new folder.
Upload files
To upload files to your server, you can drag and drop files from your computer into the file manager area. You can also click the “+ Upload” button in the toolbar to upload your files (a new window will open).

Click on “Select file” and select the files you want to upload from your computer.

If the file has been uploaded successfully, you will see a green confirmation message. To return to the “file manager”, click on “Go back to ….”.

File download
To download files from your server, select the file you want to download by clicking on it once. Then click the “Download” button on the toolbar. The file will be downloaded to your computer.

Create files
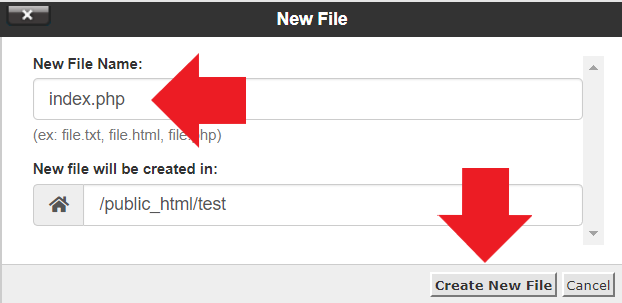
If you want to create a file, click on the “+ File” button in the toolbar (a new window will open).

Enter the file name in “New file name” and confirm the file creation by clicking on the “Create new file” button.
Edit files
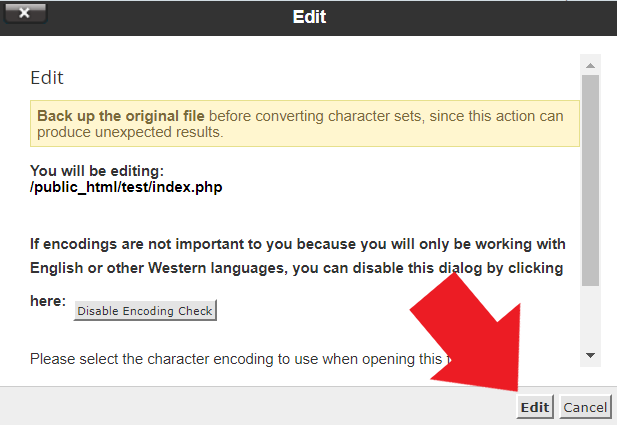
If you want to edit a file, select the file you want to edit by clicking on it once. Then click the “Edit” button on the toolbar (a new window will open).

Confirm the editing of the file by clicking on the “Edit” button.
A text editor will open in a new window, where you can make the necessary changes. When you are done, save the changes and close the editor window.

Change file permissions
If you need to change the permissions of a file, select the file by clicking on it once. Then click the “Permissions” button on the toolbar (a new window will open).

A pop-up window will appear where you can change the read, write and execute permissions of the file. To save the changes, click the “Change permissions” button.
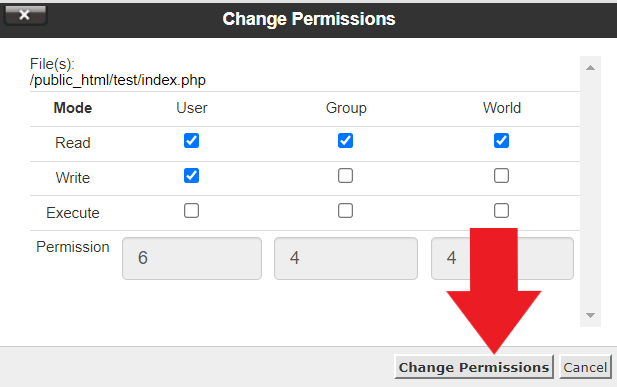
NOTE: Make sure you understand the implications of changing permissions before doing so.
Deletes files and directories
To delete files or directories, select the items you want to delete by clicking on them. Then click the “Delete” button on the toolbar (a new window will open).

A pop-up window will appear. Confirm the deletion of the file or directory by clicking the “Confirm” button. The file or directory will be sent to the trash.

NOTE: If you want to permanently delete the file or directory, check the “Skip the trash and permanently delete the files” box. Note that the deletion of the file or directory is permanent and cannot be easily recovered, so be careful when performing this action.
Rename files or directories
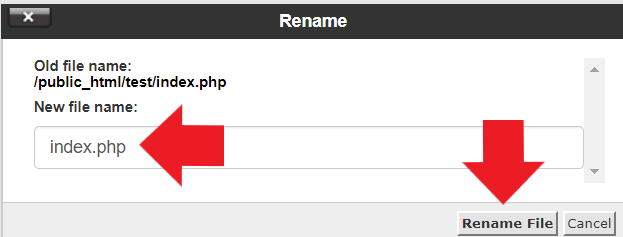
If you want to rename a file or directory, select the file or directory you want to rename by clicking on it once. Then click the “Rename” button on the toolbar (a new window will open).

Enter the new file or directory name in “New file name” and confirm the name change by clicking the “Rename file” button.
Copying files or directories
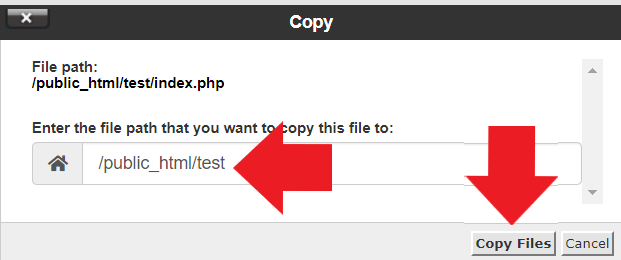
If you want to copy a file or directory, select the file or directory you want to copy by clicking on it once. Then click the “Copy” button on the toolbar (a new window will open).

Enter the path where you want to copy the file or directory in “Specify the file path where you want to copy this file” and confirm copying the file or directory by clicking the “Copy files” button.
Delete files or directories
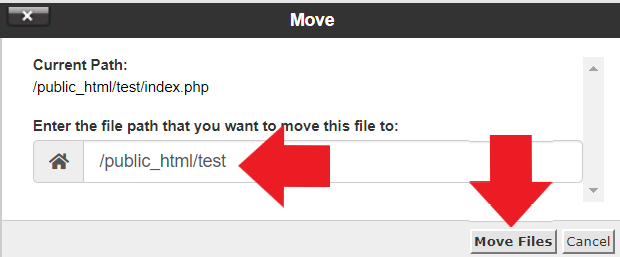
If you want to move a file or directory, select the file or directory you want to move by clicking on it once. Then click the “Move” button on the toolbar (a new window will open).

Enter the path where you want to move the file or directory in “Enter the file path that you want to move this file to” and confirm the change by clicking the “Move files” button.
Settings
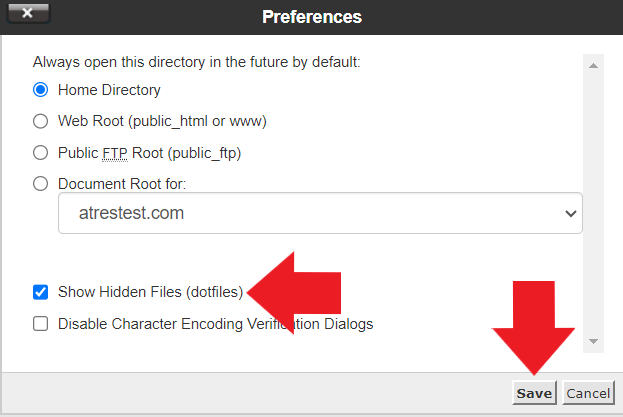
You can configure in which directory you want the “file manager” to open and display the hidden files in your account. To do this, click on the “Settings” button in the toolbar (a new window will open).

Check the “Show hidden files (dotfiles)” checkbox to display hidden files in your account, including .htaccess files.
To select in which directory you want the “file manager” to open, select one of the “Always open this directory in the future by default” options.
To save the changes, click on the “Save” button.
Conclusion
In this tutorial you have learned How to Configure Domain Redirects in cPanel.
Remember to exercise caution when making changes and always make backup copies of your important files before making major modifications.
We help you
If you have any questions or suggestions, feel free to leave us a comment in the comments section! And don’t forget to visit our BLOG, every week we publish new tutorials and guides.


