In this tutorial, you will learn How to Configure Hotlink Protection in cPanel to protect your content from being used by other websites without your permission.
What is Hotlink protection?
Hotlink protection, also known as direct link protection or hotlinking protection, is a measure used to prevent or limit unauthorized use of online resources, such as images, audio or video files, through direct links or “hotlinks”.
Hotlinking occurs when someone uses the direct link to a resource hosted on a website to display or embed that resource on their own website, without permission from the original owner of the resource. This can result in excessive server bandwidth consumption, increased hosting costs and encourage content theft.
Hotlink protection is generally implemented by configuring rules or policies on the web server hosting the resources. These rules allow the server to verify whether the request for access to the resource comes from an authorized website or not. If the request is detected as coming from an unauthorized site, the server can respond by denying access to the resource or redirecting the web site to a replacement image or error message.
Hotlink protection is a measure commonly used by website owners to protect their resources and control their online usage, thus preventing content theft and the costs associated with unauthorized use of server bandwidth.
How to Configure Hotlink Protection in cPanel
Follow the steps below to configure this protection in your cPanel account.
Step 1: Login to cPanel
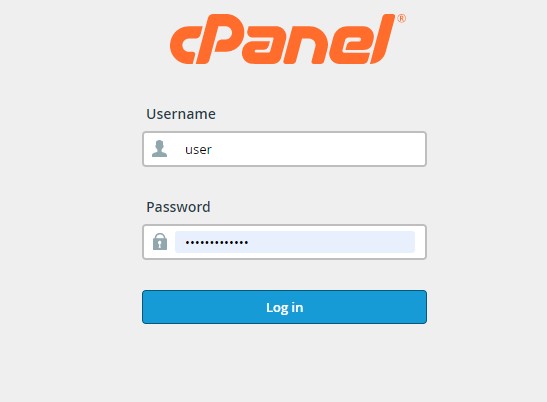
Open your web browser and enter your cPanel URL or log in to cPanel directly from the AtresHost customer area.
Enter your cPanel username and password and click “Login” to access the control panel.
Step 2: Navigate to the “Security” section in cPanel.
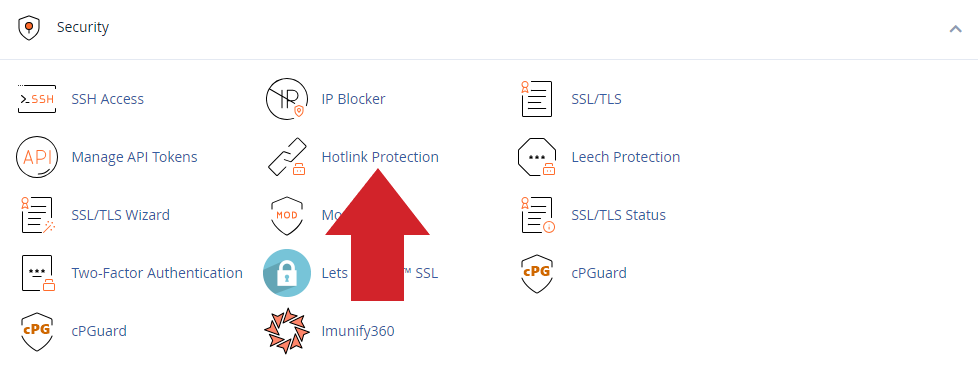
Once you are logged in to cPanel, look for the “Security” section and click on the “Hotlink Protection” icon to access the hotlink protection settings page.
Step 3: Activate Hotlink Protection
On the “Hotlink Protection” settings page you will find an option called “Enable”. Click on the “Enable” button to enable hotlink protection.

Step 4: Configure the allowed and blocked domains
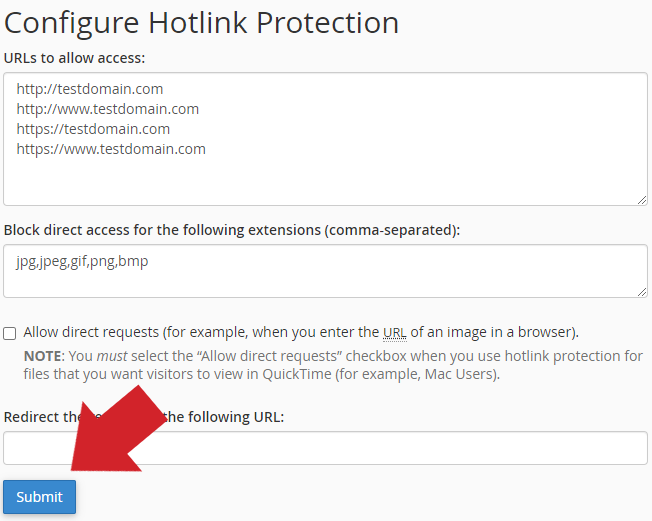
In the “Configure Hotlink Protection” section, enter the domains allowed to access your content without any restrictions. Remember to add the web addresses together with the protocol http:// and https://, as well as with and without the www. variant.

Step 5: Define allowed file extensions
In the “Block direct access for the following extensions” section, specify the file extensions you want to block for the shortcut. For example, we are going to block unauthorized use of images. To do this, enter the following extensions: jpg,jpeg,gif,png,bmp.

NOTE: remember to enter the extensions separated by commas “,”.
Step 6: Customize the error message
In the “Redirect request to the following URL” section you can customize the error message that will be displayed to users who try to access your content in an unauthorized way. Enter the URL (web address) of the custom page, or leave the field blank to use the server’s default error message.

Step 7: Save the configuration
Finally, once you have completed the configuration, click on the “Submit” button to save and apply the changes.
Conclusion
In this tutorial you have learned How to Configure Hotlink Protection in cPanel.
Configuring Hotlink Protection in cPanel is an important measure to protect your content against bandwidth theft. Follow the steps detailed in this tutorial and you will improve the protection of your content.
We help you
If you have any questions or suggestions, feel free to leave us a comment in the comments section! And don’t forget to visit our BLOG, every week we publish new tutorials and guides.


