

Today we will teach you “How to connect via FTP and SFTP to your Hosting and Reseller account” with this simple step by step tutorial.
What is FTP?
FTP (File Trasnfer Protocol) is a network protocol for transferring files between connected systems. From a computer (client) it connects to a server to download and send files. Thanks to this service we can manage the files faster than doing it through the File Manager of the cPanel control panel.
What is SFTP?
SFTP (Secure File Transfer Protocol) is a network protocol that allows you to transfer encrypted data between your local computer and the web space you have in your AtresHost hosting or reseller via Secure Shell (SSH).
FTP Connection Settings
To easily manage your account files, download and install the FileZilla FTP client through this link. Once you have downloaded and installed it, open the FTP client to begin the configuration.
FTP configuration
The first step is to access your cPanel. Once inside and from the “Files” module, click on “FTP Accounts” to view the FTP server access information.

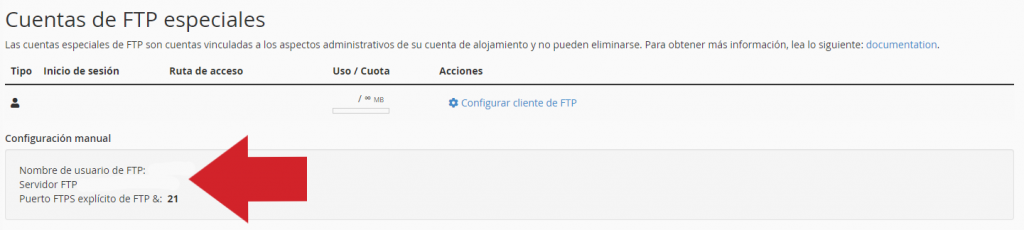
At the bottom of the page you will find the account for the cPanel administrator under “Special FTP Accounts”. Click on “Configure FTP client” to display the connection information.

The following information for the connection will be displayed:
- FTP Username
- FTP server
- FTP & explicit FTPS port
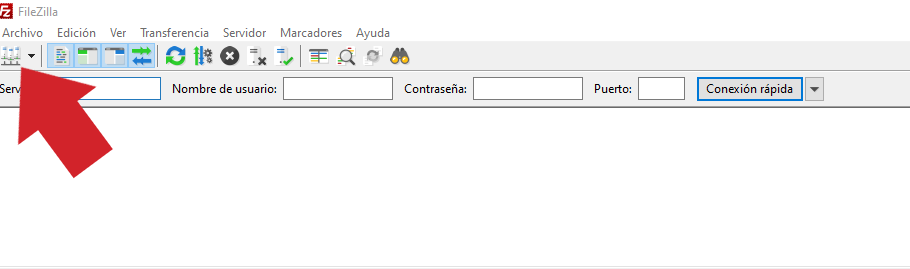
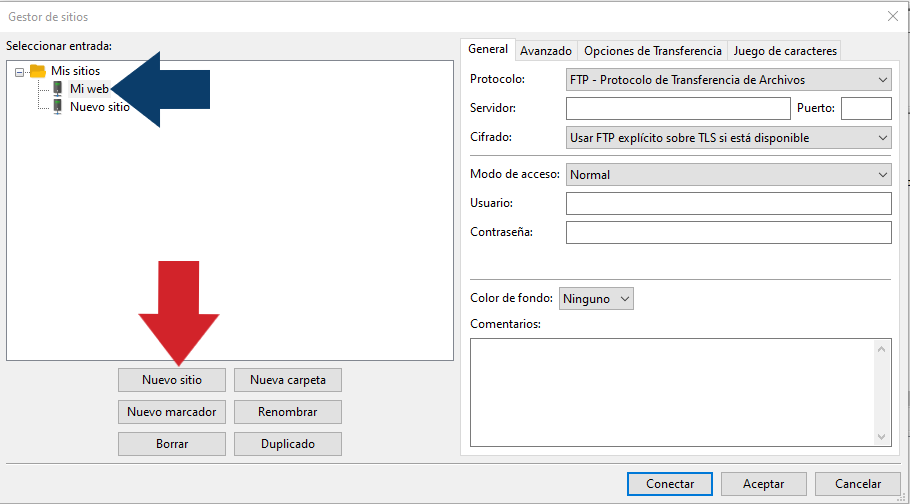
Open the FileZilla program to add the information of the connection we are going to make. To do this, go to “File > Site Manager…” and click on the “New Site” button or access it directly from the icon below.
A pop up window will open. Click on “New Site” (red arrow) and type the name you want to identify the connection (blue arrow).
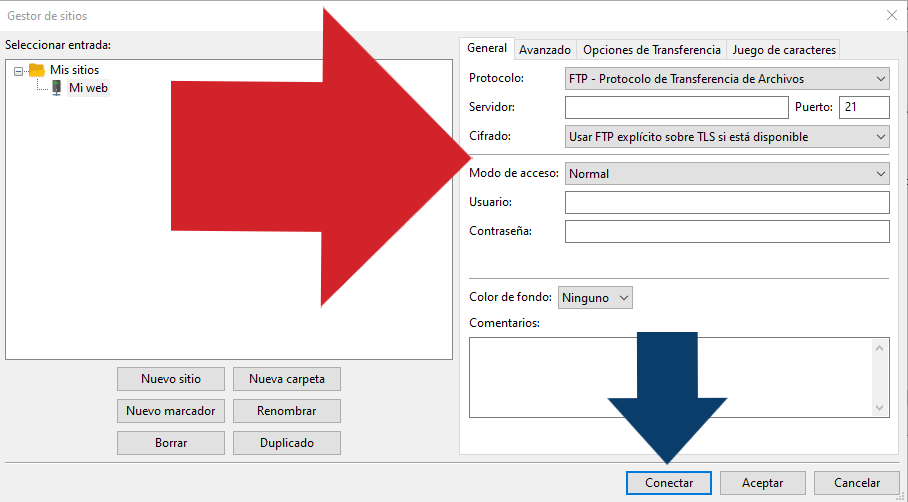
Now fill in the spaces with the information obtained from the cPanel control panel (red arrow) and click on “Connect” (blue arrow):
- Protocol – File Transfer Protocol
- Host: host listed in cPanel (ftp.yourdomain.com)
- Port: 21
- IMPORTANT! Encryption: “Require explicit FTP over TSL”. This way the connection will be encrypted over TSL
- Logon Type: Normal
- User: user indicated in cPanel
- Password: your account password (available in the welcome email with the account information)
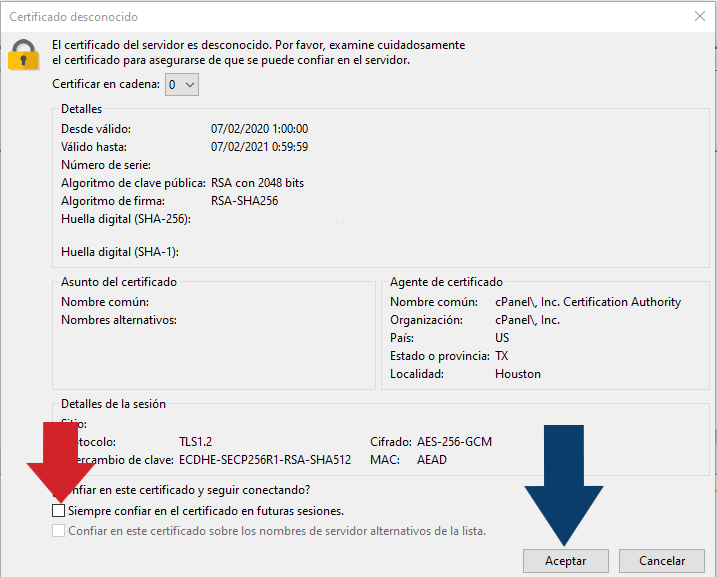
A new pop-up window will be displayed over the server certificate. Select the box “Always trust this certificate in future sessions” (red arrow) and click “OK” (blue arrow).
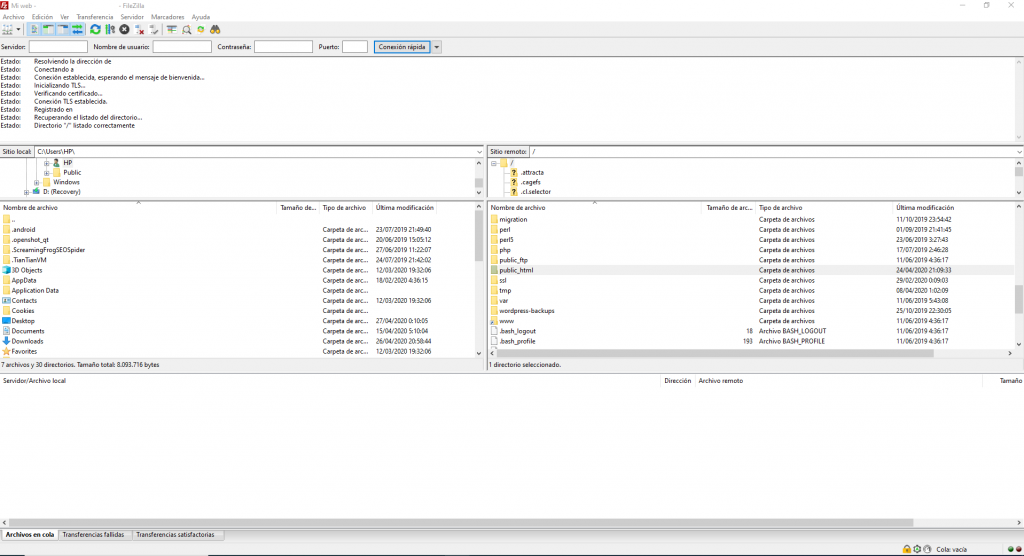
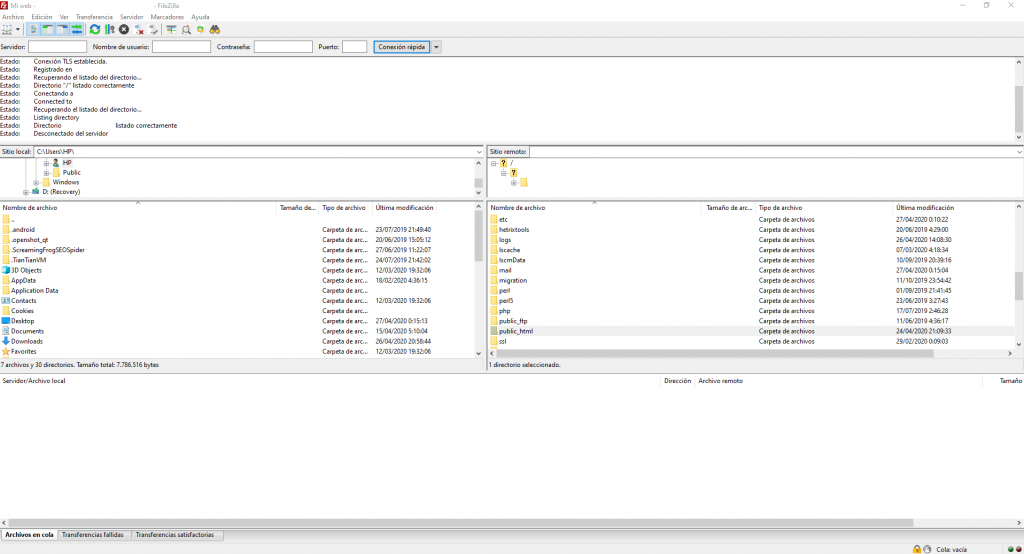
If you have entered the data correctly, the connection will be made and you will be connected to the server. On the left side you will see the local files of your computer and on the right side, the files and folders of your hosting or reseller account.
Remember that to upload your files, you have to do it inside the “public_html” folder.
SFTP configuration
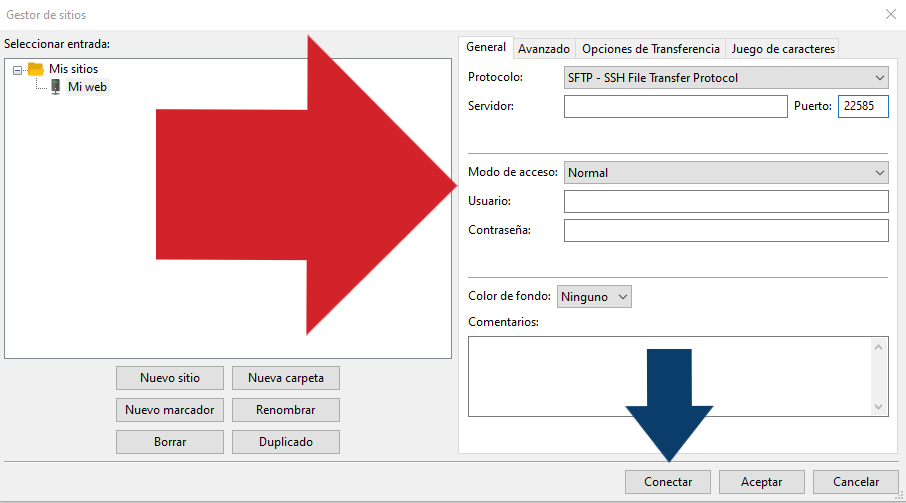
The SFTP connection is practically the same as via FTP. The only variation is that the protocol and the port differ, having to make the following configuration (red arrow):
- Protocol -SFTP – SSH File Transfer Protocol
- Host: host listed in cPanel (ftp.yourdomain.com)
- Port: 22
- Logon Type: Normal
- User: user indicated in cPanel
- Password: your account password (available in the welcome email with the account information)
Remember to click on “Connect” (blue arrow).
The pop up window about the server certificate will be displayed again. Select the box “Always trust this certificate in future sessions” (red arrow) and click “OK” (blue arrow).
If you have entered the data correctly, the connection will be made and you will be connected to the server. On the left side you will see the local files of your computer and on the right side, the files and folders of your hosting or reseller account.
Remember that to upload your files, you have to do it inside the “public_html” folder.
Done! You can now manage all the files in your account more efficiently. If you have not been able to set up your account correctly, please contact our Customer Service.