

One of the advantages you have when contracting a Hosting, Reseller Hosting, Master Reseller Hosting, Alpha Reseller Hosting, Super Alpha Reseller Hosting or Mega Super Alpha Reseller Hosting with AtresHost is that you can configure your private DNS.
Today we’re going to teach you how to set up your own DNS in a simple step by step tutorial.
CONFIGURE PRIVATE DNS FOR HOSTING AND RESELLER HOSTING
The first step is to access your domain provider’s Control Panel to configure the DNS next to the IP’s they have to point to. There are 2 options depending on whether the domain is with AtresHost or with another provider.
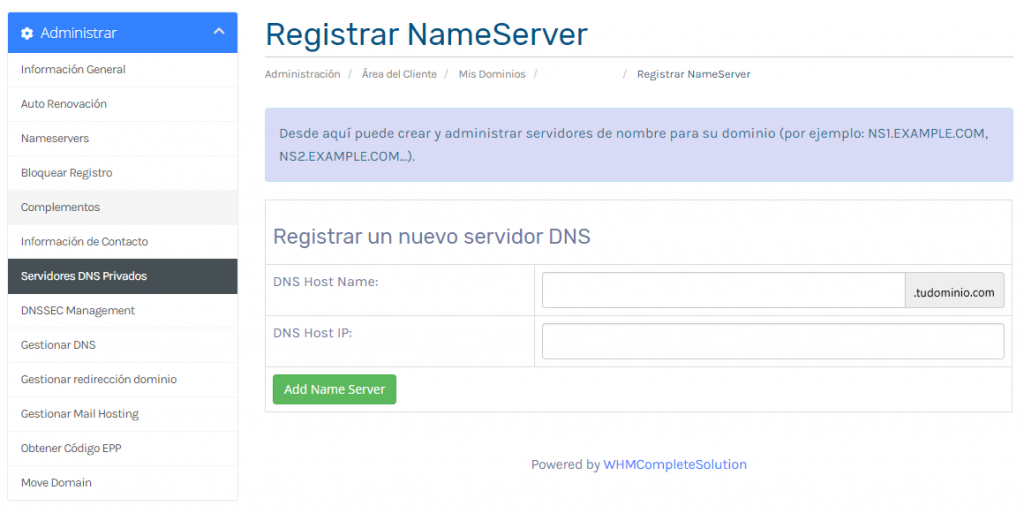
1-. If your domain is hosted at atreshost.com, access Control Panel > My Domains > Private NameServers and configure the following data:
Nameserver 1 – DNS HOST NAME: dns1.yourdomain.com (in yourdomain.com goes the domain associated with the plan) | DNS HOST IP: 116.202.250.8
Nameserver 2 – DNS HOST NAME: dns2.yourdomain.com (in yourdomain.com goes the domain associated with the plan) | DNS HOST IP: 116.202.250.116
IMPORTANT NOTE: If you have contracted a DEDICATED IP, you can configure the dns1 and dns2 with the dedicated IP for your domain and the dns3 and dns4 with the server IPs for your clients’ domains (116.202.250.8 and 116.202.250.116) or use only the dedicated IP to configure all your private DNS, as you prefer.
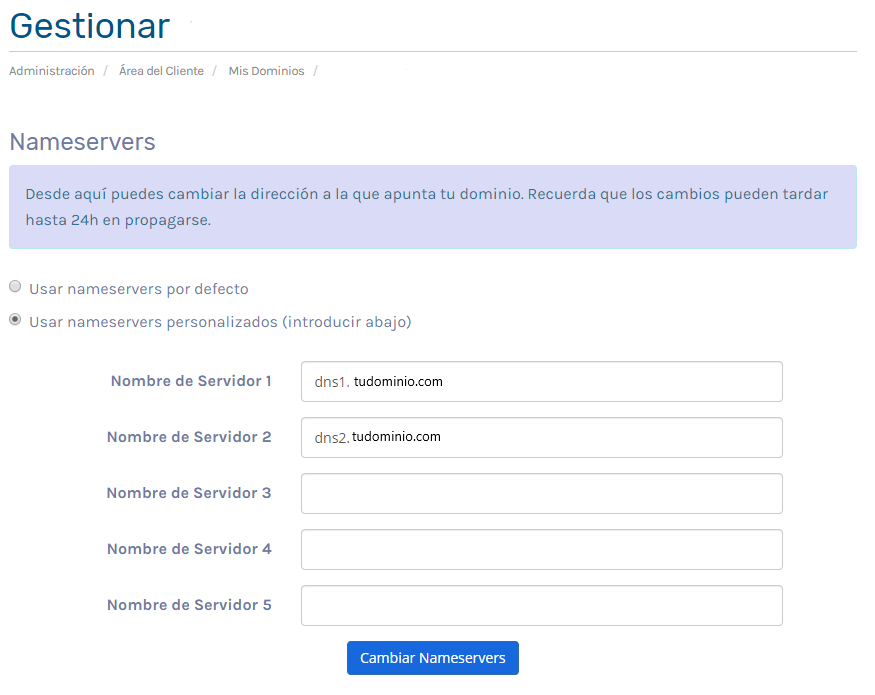
Then, go to the Nameservers section of the Control Panel, select USE CUSTOM NAMESERVERS and enter the DNS you created in the previous step. Finally, click on Change Nameservers.
2-. If your domain is hosted by another provider*, you have to access their control panel and look for a section named “Private DNS” or “Private nameserver” to configure the following data:
Nameserver 1: dns1.yourdomain.com (in yourdomain.com goes the domain associated with the plan) IP address: 116.202.250.8
Nameserver 2: dns2.yourdomain.com (in yourdomain.com goes the domain associated with the plan) IP address: 116.202.250.116
Then, go to the Nameservers section of your domain provider’s Control Panel and enter the DNS you created in the previous step.
NOTE*: If your registrar does not have that option, you will not be able to have your own private dns and you will have to use the AtresHost ones. As a last option, you can transfer the domain with us.
COMPLETING THE DNS RECORD
The next and last step is done from the cPanel of your AtresHost account.
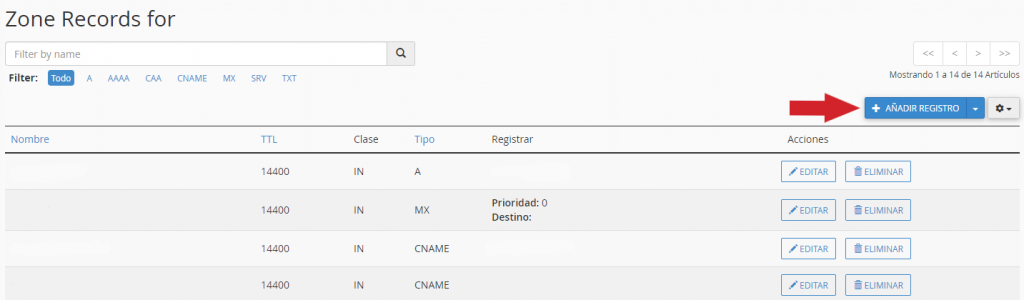
Access your cPanel and navigate to the DOMAINS module and click on ZONE EDITOR.

Click on MANAGE.

You are now in the configuration of your domain(s). Click on + ADD RECORD.
In name write dns1 (the rest of the domain will be completed automatically), in register write the IP address 116.202.250.8 and click on ADD RECORD.
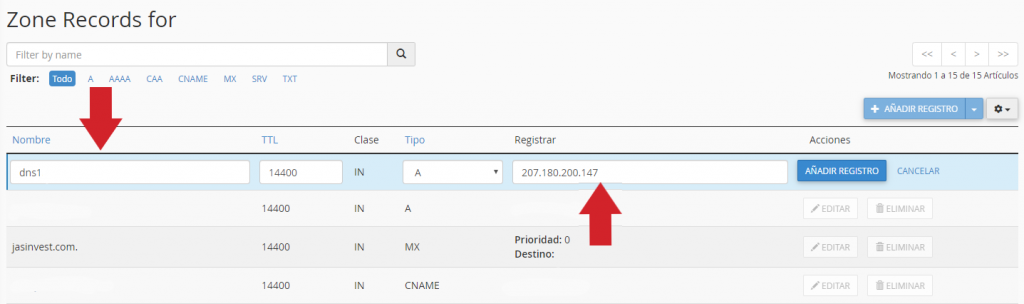
Click again on + ADD RECORD.
In name write dns2 (the rest of the domain will be completed automatically), in register write the IP address 116.202.250.116 and click on ADD RECORD.
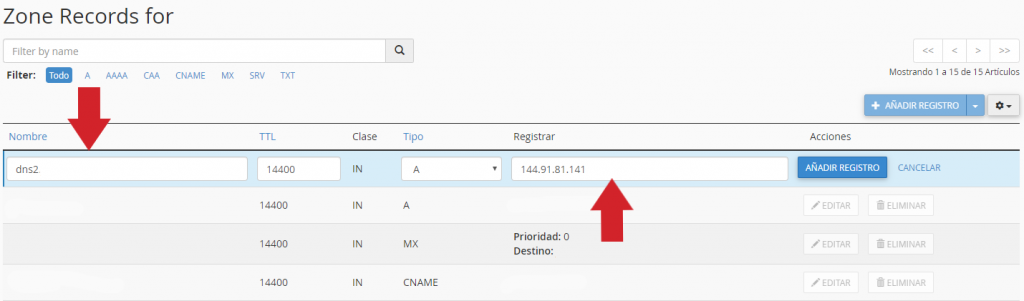
The result after registering the new DNS has to be like the image below:

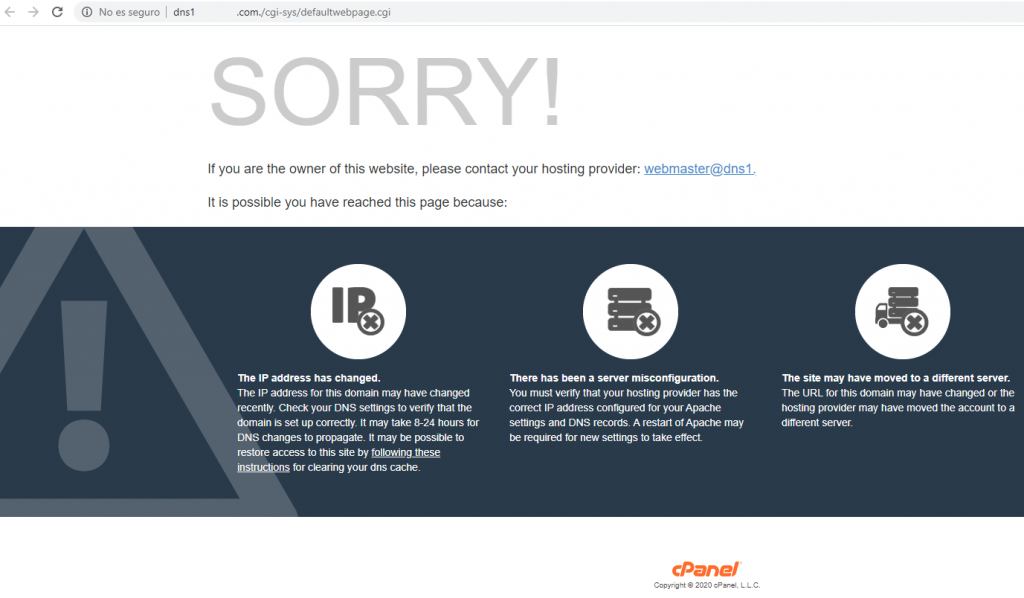
After a few minutes and accessing the registered dns, the following web page should appear.
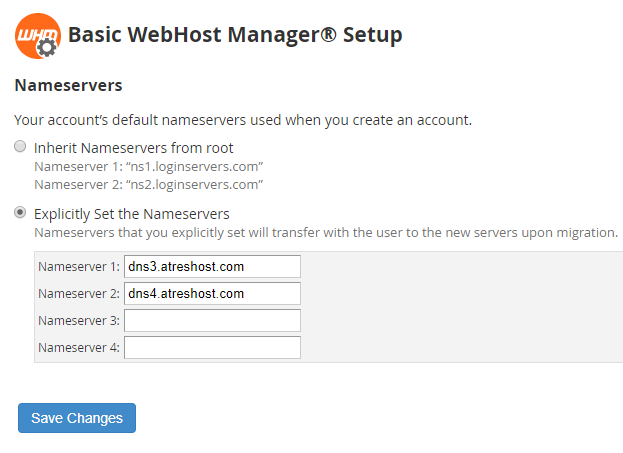
ADDITIONAL STEP FOR RESELLER, MASTER RESELLER, ALPHA RESELLER, SUPER ALPHA RESELLER AND MEGA SUPER ALPHA RESELLER
If you are a Reseller Hosting, Master Reseller Hosting, Alpha Reseller Hosting, Super Alpha Reseller Hosting or Mega Super Alpha Reseller Hosting at AtresHost, you will have to perform one last additional step.
Access your WHM, click on Basic WebHost Manager® Setup, select the option Explicitly Set the Nameservers and fill in Nameserver 1 and Nameserver 2 with the DNS you created in the previous step and click on SAVE CHANGES.
We already have our own Private DNS registered and in operation.
We hope that the tutorial was as simple as possible.